Easy Knit Scarf for Beginners
Easy Knit Scarf for Beginners
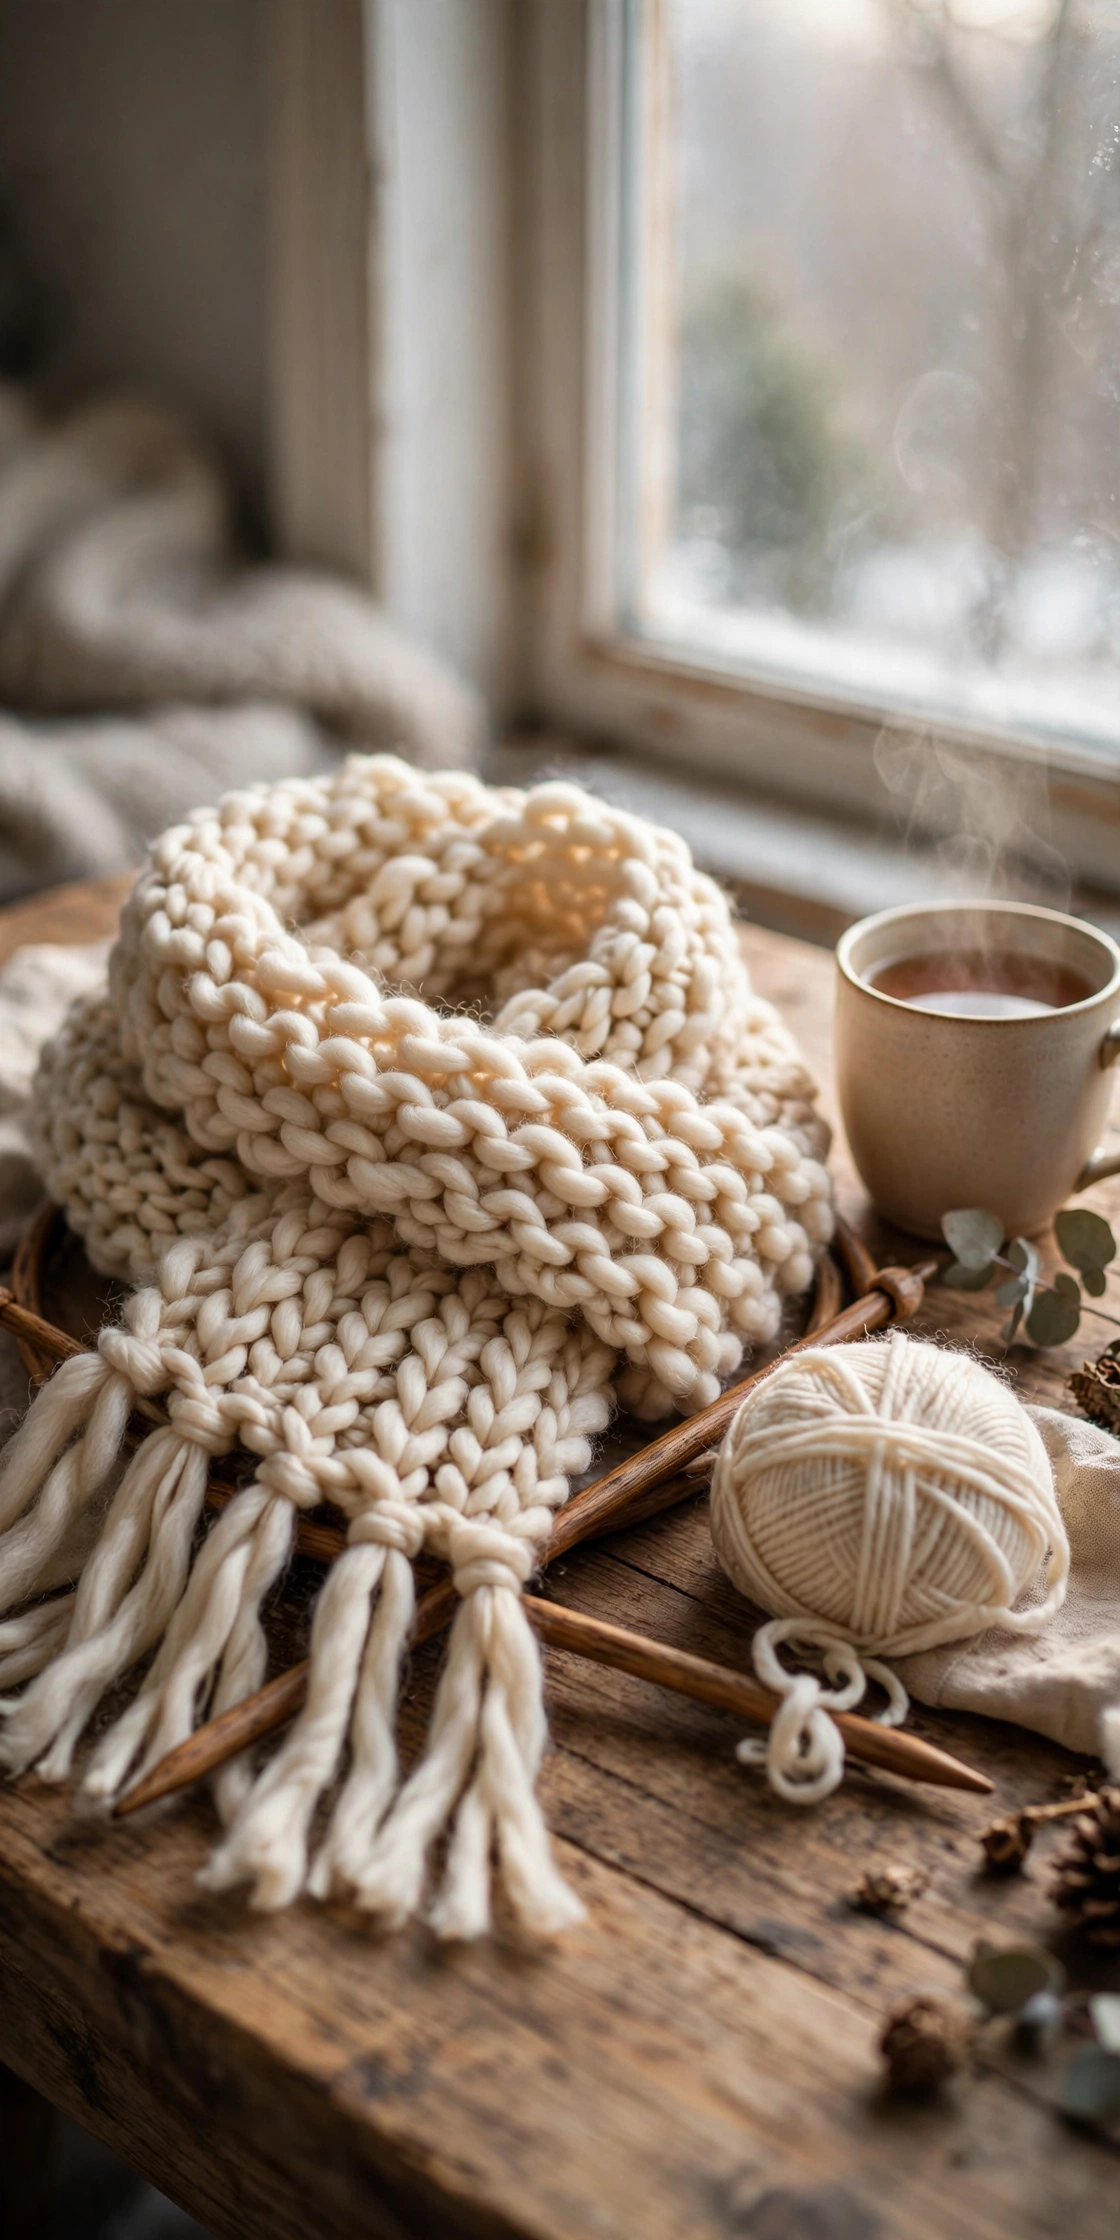
If you’ve ever wanted to learn to knit, a scarf is the perfect first project. It’s just one long rectangle using only the most basic stitch, and mistakes barely show in the cozy texture. By the time you finish, you’ll have a beautiful handmade scarf — and the confidence to tackle your next project.
This guide walks you through everything, from picking yarn to casting off your final stitch. No experience needed.
What You’ll Need
• Yarn: 1–2 skeins of chunky or bulky-weight yarn in a color you love (look for “5” or “6” on the label). Chunky yarn knits up fast and makes stitches easy to see.
• Needles: US size 10–13 (6–9 mm) straight needles to match your yarn — check the yarn label for the recommended size.
• Scissors and a tapestry needle (a large blunt needle) for weaving in ends.
• Optional: a row counter or a simple tally on paper to track your rows.
Learn the Two Skills You Need
You only need two techniques for this entire scarf: casting on (putting the first stitches on the needle) and the knit stitch.
Casting on: Make a slip knot and place it on one needle. Then add stitches with the long-tail or simple loop method until you have your starting number. For a standard scarf with chunky yarn, cast on 20–25 stitches.
The knit stitch: Insert the right needle into the first stitch on the left needle from front to back, wrap the yarn around the right needle, pull a loop through, and slide the old stitch off. Repeat across the row. That’s it — every row of this scarf is knit stitches, which creates the classic squishy garter stitch texture.
Step-by-Step: Knitting Your Scarf
Step 1 — Cast on. Cast on 20–25 stitches. Don’t pull them too tight; you should be able to slide them easily along the needle.
Step 2 — Knit the first row. Knit every stitch across the row. Your first few rows will look messy and uneven — that’s completely normal. Keep going.
Step 3 — Keep knitting every row. Turn your work and knit every stitch of every row. This is the garter stitch. After about 10 rows, you’ll see the pretty ridged texture forming, and your tension will start to even out naturally.
Step 4 — Check your length. A standard adult scarf is about 60–70 inches long (before fringe). Measure every so often. When you run low on yarn, that’s a good sign you’re near the end — just make sure you save enough for casting off.
Step 5 — Cast off. Knit two stitches, then lift the first stitch over the second and off the needle. Knit one more stitch, lift the previous over again. Repeat until one stitch remains, cut the yarn leaving a 6-inch tail, pull it through the last loop, and tighten.
Step 6 — Weave in the ends. Thread your yarn tails onto the tapestry needle and weave them through the back of the stitches for a few inches, then trim. This keeps everything secure and tidy.
Step 7 — Add fringe (optional). Cut yarn pieces twice your desired fringe length, fold each in half, pull the loop through the scarf’s edge with a crochet hook or your fingers, then pull the ends through the loop and tighten. Fringe gives your scarf a lovely finished look.
Fixing Common Beginner Mistakes
Dropped a stitch? Don’t panic. Use a crochet hook (or your needle tip) to catch the loose loop and pull it back up through the rows above it, then place it back on the needle.
Edges getting wider or narrower? You’re probably adding or dropping stitches at the ends of rows. Count your stitches every few rows — if the number matches what you cast on, you’re fine.
Holes in your work? You may have accidentally wrapped the yarn around the needle without knitting a stitch (a yarn-over). Just keep going — small holes add character, and nobody will notice in a chunky scarf.
Choosing Yarn You’ll Love
For your first scarf, pick a smooth, light- or medium-colored yarn — dark or fuzzy yarn makes it hard to see your stitches. Wool and wool blends are warm and forgiving; acrylic is affordable and easy to wash. Avoid very slippery or novelty yarns until you’re comfortable with the basics. A scarf you knit yourself also makes a wonderful gift — pair it with ideas from thoughtful DIY gifts for her for a complete handmade present.
Styling Your Handmade Scarf
Now the fun part — wearing it! A chunky hand-knit scarf looks amazing with a simple coat and jeans, adding instant texture to winter layering outfits. Drape it once around your neck for a relaxed look, or loop it twice for extra warmth.
Frequently Asked Questions
How long does it take a beginner to knit a scarf?
With chunky yarn, most beginners finish a scarf in 8–15 hours of knitting, spread over a couple of weeks. Thinner yarn takes longer, so chunky yarn is the fastest path to a finished scarf.
How much yarn do I need for a scarf?
For a standard adult scarf in chunky yarn, you’ll need about 200–400 yards, which is usually 1–2 skeins depending on the skein size. Check the yardage on the label and buy a little extra to be safe.
What is the easiest knit stitch for beginners?
The knit stitch (garter stitch when worked every row) is the easiest and the only stitch this scarf uses. Once you’re comfortable, the purl stitch is the natural next step.
Why does my knitting look uneven?
Uneven tension is completely normal for beginners — everyone’s first rows look a little wobbly. Your stitches will even out naturally within the first 20–30 rows as your hands find a rhythm, and blocking the finished scarf smooths things further.