DIY Dried Orange Garland for Christmas
DIY Dried Orange Garland for Christmas
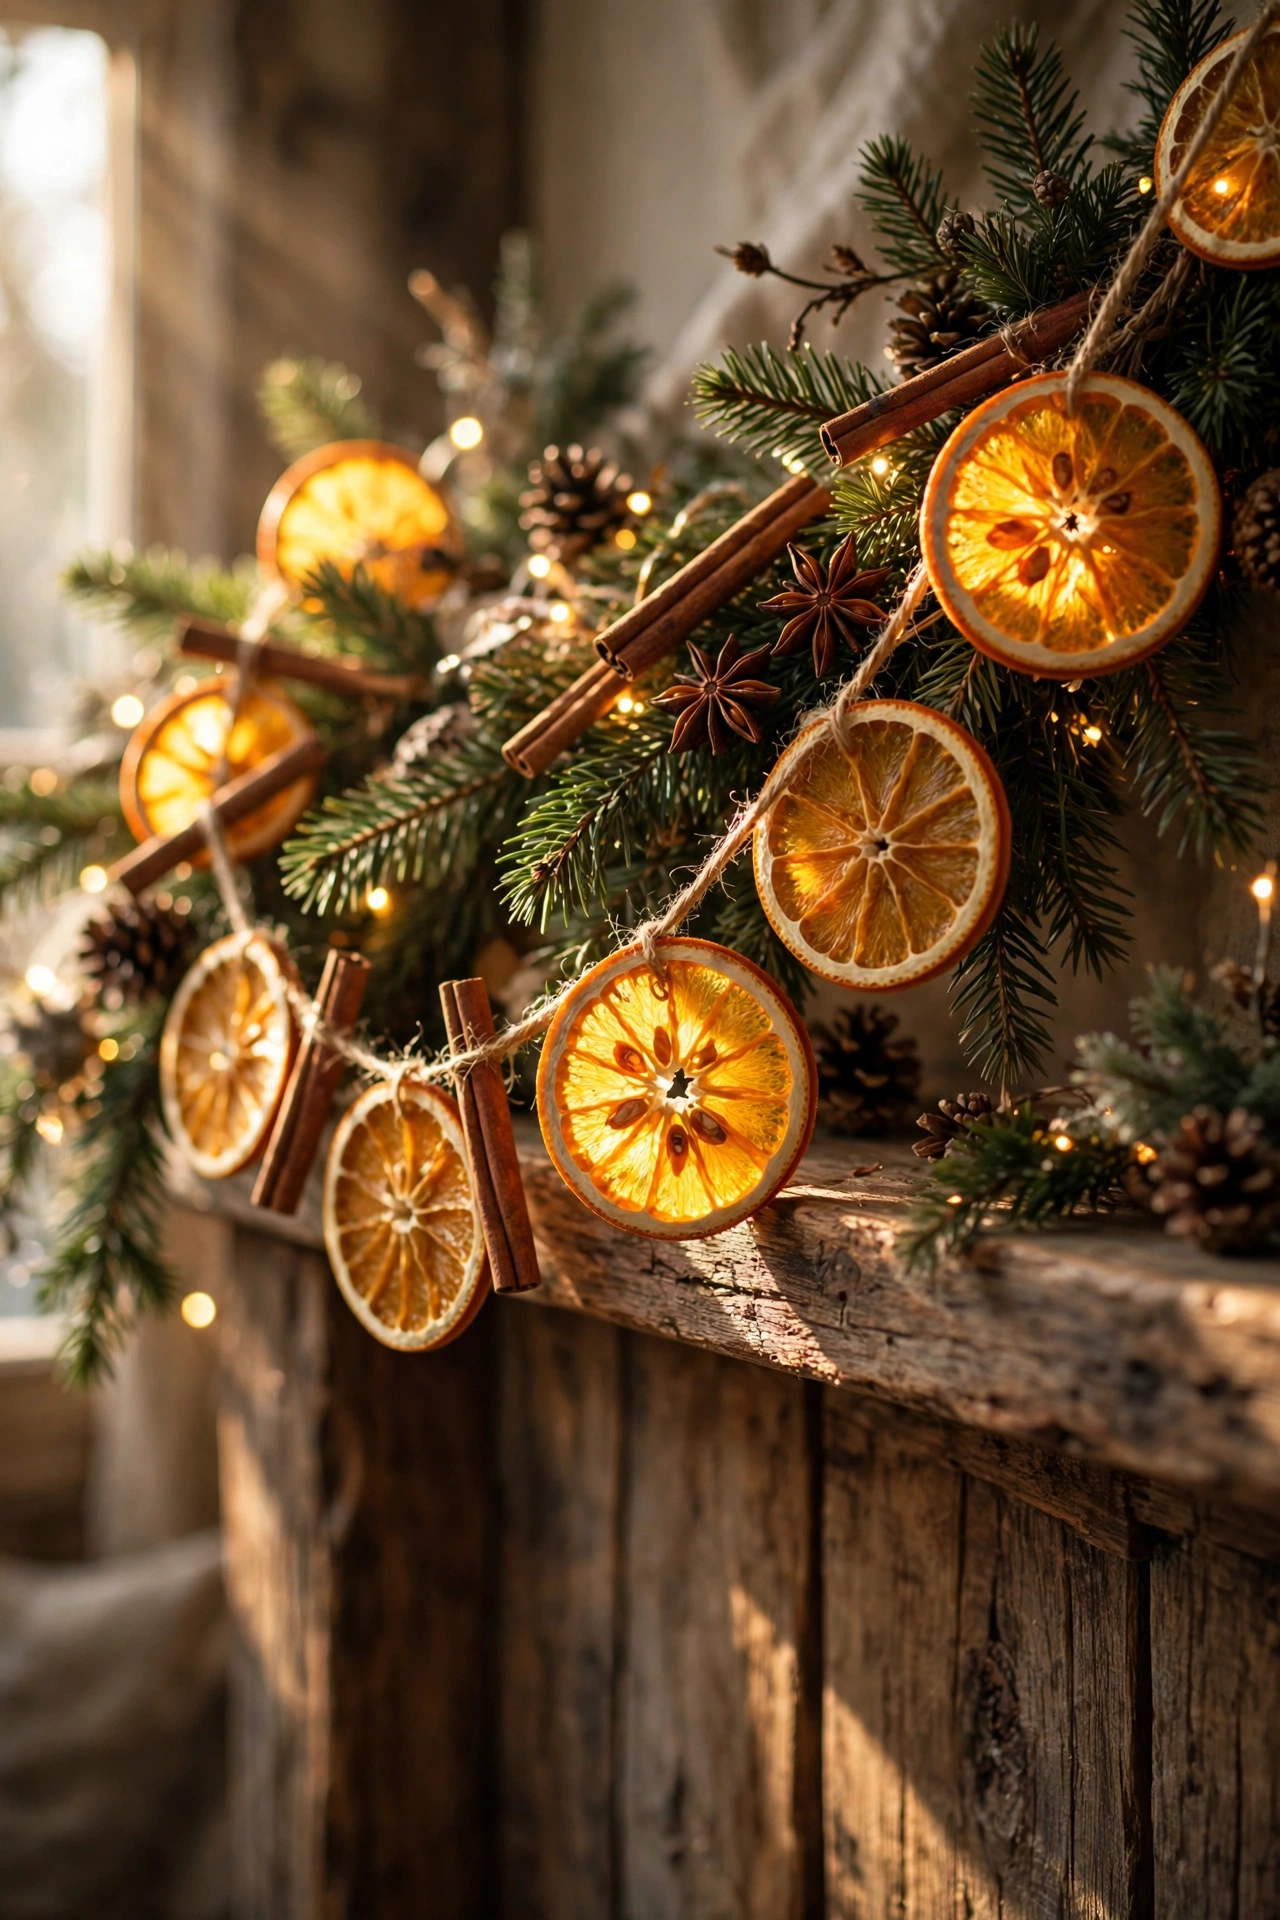
Few decorations capture Christmas coziness like a dried orange garland. The warm amber slices, the faint citrus-and-spice scent, the way they glow when tree lights shine through them — it’s pure holiday magic. And the best part? This classic decoration costs almost nothing to make and looks like something from a high-end holiday catalog.
Here’s everything you need to know to make your own, from drying the oranges perfectly to hanging the finished garland beautifully.
What You’ll Need
• 4–6 large oranges (navel oranges work great; blood oranges are stunning too)
• Sharp knife and cutting board
• Baking sheets and parchment paper or a wire cooling rack
• Twine, jute string, or thin ribbon
• Large needle, small nail, or skewer for stringing
• Optional: cinnamon sticks, dried bay leaves, star anise, wooden beads, fairy lights
How to Dry Orange Slices
Steps:
1. Preheat your oven to 200°F (95°C) — low and slow is the secret. Line baking sheets with parchment paper.
2. Slice the oranges crosswise into ¼-inch rounds. Try to keep the slices even so they dry at the same rate. Pat each slice dry with paper towels to remove surface juice.
3. Arrange the slices in a single layer on the baking sheets, making sure they don’t overlap.
4. Bake for 2–3 hours, flipping the slices every 30–45 minutes. They’re done when they feel dry and slightly stiff, with no sticky or wet spots.
5. Let the slices cool completely on a wire rack. They’ll firm up more as they cool.
Tips for perfect slices: Thinner slices dry faster and look more translucent, but they’re fragile — ¼ inch is the sweet spot. If any slices brown too quickly, your oven may run hot; prop the door open slightly with a wooden spoon. You can also dry slices in a food dehydrator at 135°F for 6–8 hours.
How to String Your Garland
Steps:
1. Cut your twine to the desired length, adding an extra foot on each end for hanging loops.
2. Thread your large needle with the twine (or simply push a skewer through to make a starter hole, then thread the twine through).
3. Pierce each orange slice near the top edge, just below the rind, and slide it down the twine. Space slices 2–4 inches apart.
4. Between slices, add your extras: tie on cinnamon sticks with small pieces of twine, thread wooden beads, or tuck in star anise.
5. Tie a loop at each end for hanging, and your garland is ready.
5 Beautiful Ways to Style It
1. On the Christmas Tree
Drape the garland loosely around your tree, tucking it slightly into the branches. The orange slices glow gorgeously when the tree lights shine through them. This looks especially stunning on a real tree with warm white lights.
2. Across the Mantel
Swag the garland along your mantel, letting the ends drape down on each side. Layer it with evergreen branches and a few pinecones for a full, festive look. It pairs beautifully with other DIY Christmas decor for a coordinated mantel.
3. In a Window
Hang a shorter garland across a window so daylight shines through the slices. The translucent amber glow is absolutely beautiful — it’s like a natural stained-glass window.
4. As a Table Runner
Lay the garland down the center of your holiday table instead of hanging it. Add candles, greenery, and a few extra loose slices around it. It’s a centerpiece that costs almost nothing and looks incredibly intentional.
5. On a Wreath
Wind a short garland around a simple evergreen wreath, or glue individual dried slices onto a DIY holiday wreath for extra charm. The combination of green and amber is a classic Christmas palette.
Variations to Try
Mix in dried apple or lemon slices for color variety — lemons dry to a beautiful pale gold. Add whole dried orange halves studded with cloves (a traditional pomander) at intervals along the garland. For a snowy effect, brush the edges of the slices very lightly with white craft paint. And if you love the natural look, browse these thrifted home decor ideas for vintage pieces that pair perfectly with handmade garlands.
Storage and Reuse
Dried orange garlands keep beautifully for several seasons. After the holidays, gently coil the garland, wrap it in tissue paper, and store it in a box in a cool, dry place. If slices get dusty next year, wipe them gently with a dry cloth. Discard any slices that feel soft or sticky — properly dried slices should stay firm.
Frequently Asked Questions
How long does it take to dry orange slices?
In an oven at 200°F, expect 2–3 hours with regular flipping. In a food dehydrator at 135°F, plan for 6–8 hours. Thinner slices dry faster, so aim for an even ¼-inch thickness.
Why are my dried oranges turning brown?
Browning usually means the oven is too hot. Drop the temperature to 200°F or below, flip more often, and consider propping the oven door open slightly to let moisture escape. A little darkening at the edges is normal and looks rustic.
How long will a dried orange garland last?
One full holiday season at minimum — and with careful storage in a cool, dry place, you can reuse it for several years. Keep it away from humidity, which can make the slices sticky.
Can I dry oranges in the microwave or air fryer?
It’s not recommended. Microwaves cook unevenly and can scorch the slices, while most air fryers run too hot and blow the lightweight slices around. Low oven heat or a dehydrator gives the best, most even results.