
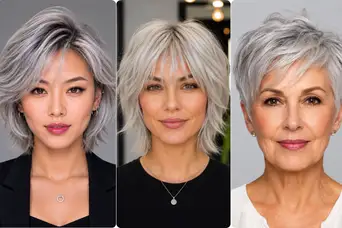

21 Hairstyles for Thin Fine Grey Hair That Actually Look Thicker (Not Thinner)
My hair went grey early, somewhere around 41, and thin and fine not long after, closer to 48. For a few years, I fought it with volumising shampoos that never quite delivered on their promises. The real fix wasn’t a product at all. It was finally finding hairstyles for thin, fine grey hair that work with the texture instead of fighting it.
Every cut on this list, I’ve either worn myself, watched a client wear through a full grow-out cycle, or tested across a few different head shapes before trusting it enough to write about. Some flopped completely. A couple genuinely surprised me. I’ll tell you which ones to skip if your hair is fragile at the ends, not just thin at the root.
1. The Classic Pixie Cut
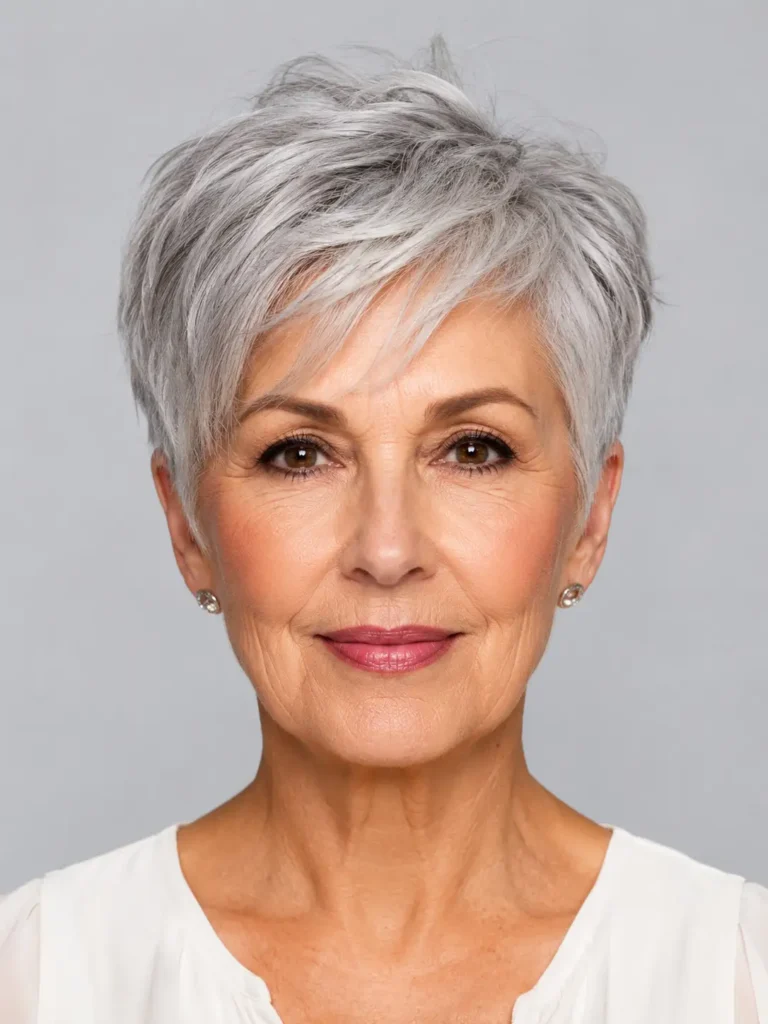
I went short for the first time at 54, right after my colorist mentioned how see-through my crown looked under the salon lights. A pixie sounds drastic, but on thin fine grey hair it reads thicker, because every strand gets cut at one confident length instead of trailing into limp, fading ends. My stylist kept the nape slightly longer so it never looked severe.
My mistake the first round was asking for “as short as possible.” That left almost nothing to style with, so I had zero options on a bad hair day. Now I ask for at least an inch and a half on top. A small dab of Bumble and bumble Thickening Dryspun, worked in with fingertips, is genuinely all it needs.
2. The Textured, Lived-In Bob
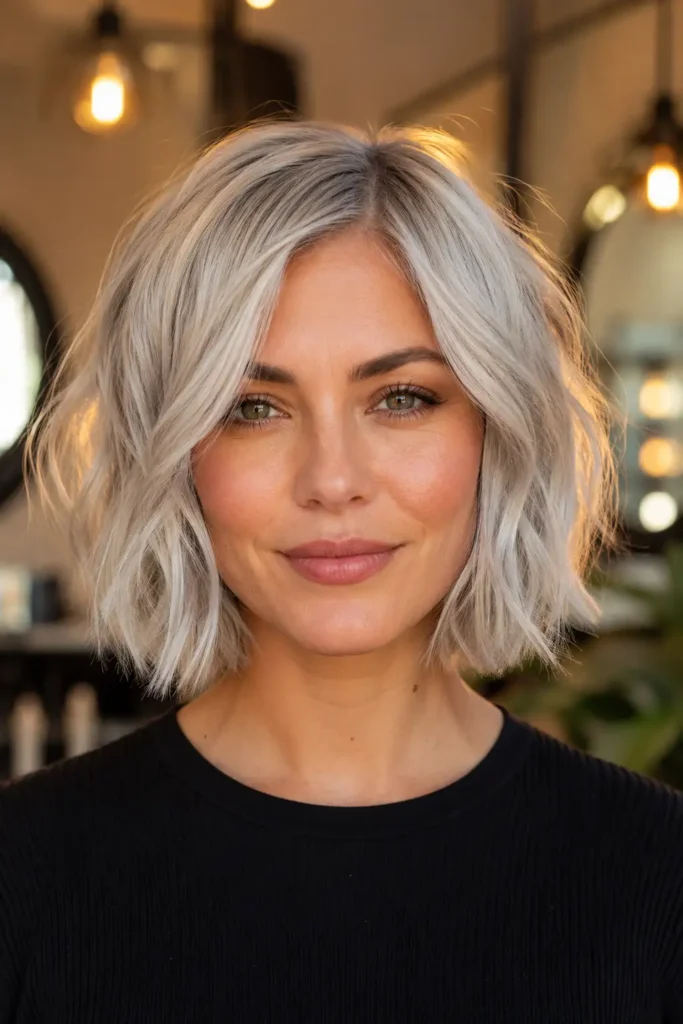
A bob was my “safe” cut for years before I worked up the nerve to go shorter. The version that actually held up on thin fine gray hair wasn’t the smooth, blunt one from old magazine photos. It was a slightly choppy, point-cut bob landing just above the shoulder, with ends textured so they didn’t fall into one flat sheet.
My stylist used a razor on the perimeter instead of straight shears, which roughs up the ends just enough to create grip. Without that, fine hair slides into a thin little curtain by 2 p.m. A light sea salt spray, like R+Co Rockaway, scrunched in damp, keeps that broken-up texture through the day.
3. The Modern Shag
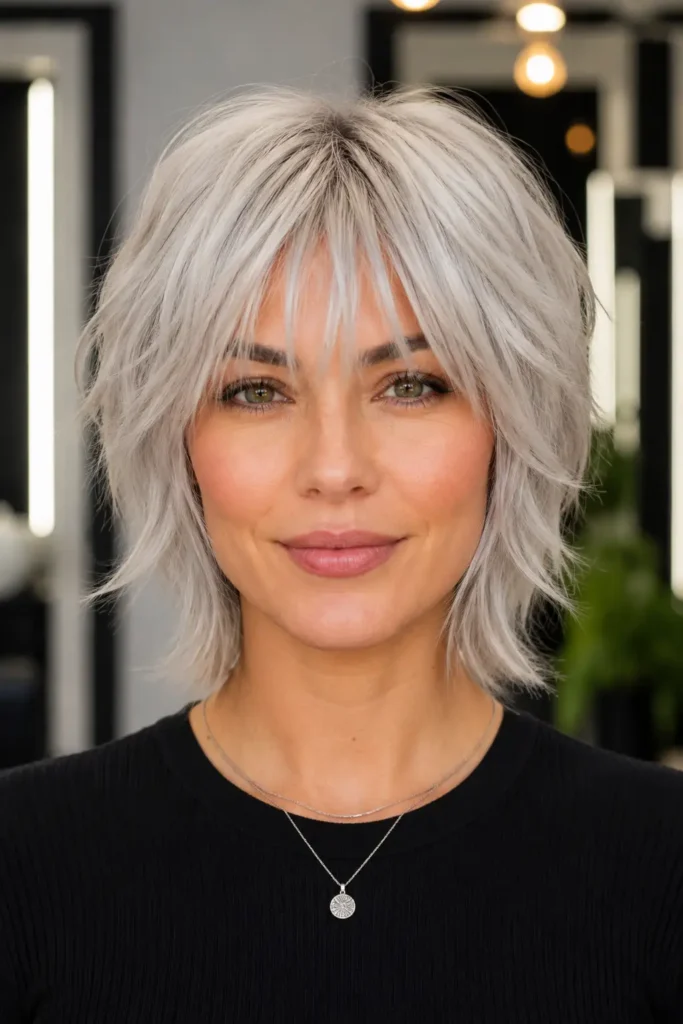
I was skeptical about shags on gray hair, since the look is photographed so heavily layered in magazines. On thin strands, you can’t take out that much weight, or there’s nothing left. The version that worked was a soft shag with the heaviest layering concentrated only at the crown, leaving more density lower down for visual weight.
A reader once messaged me asking if shags make thin hair look stringy. They can, if the layers are cut too uniform. Ask for irregular, slightly disconnected layers instead of a neat staircase. I finish mine with a round-brush blowout and a finishing cream rubbed between fingertips, never a flat iron, which flattens the shape’s movement.
4. The Long Bob (Lob) With Subtle Layers
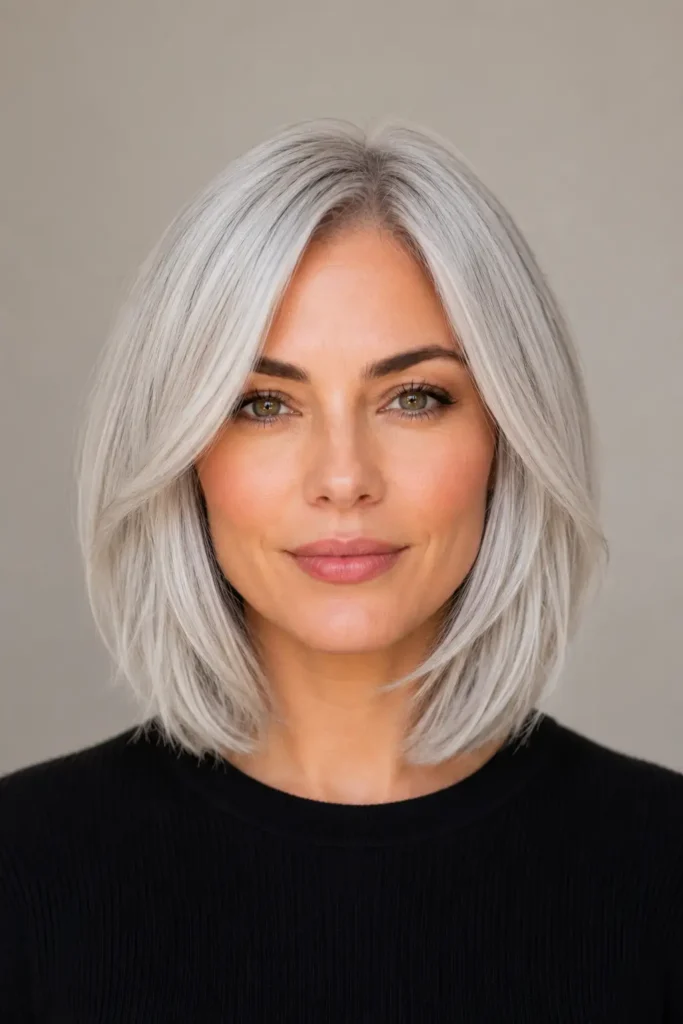
The lob is the cut I recommend to anyone nervous about going short for the first time. It keeps enough length to feel familiar but removes the dead weight that drags thin, fine gray hair flat by midday. Mine sits just below the jaw, with soft internal layers lifting the crown without choppy edges.
The result surprised me most at the temples, where my hair always went see-through first. Layering there redistributes a few strands to cover that thin patch instead of parting around it. I blow-dry with a small round brush, lifting straight up at the root, then let it cool before touching it again.
5. The Blunt Chin-Length Bob
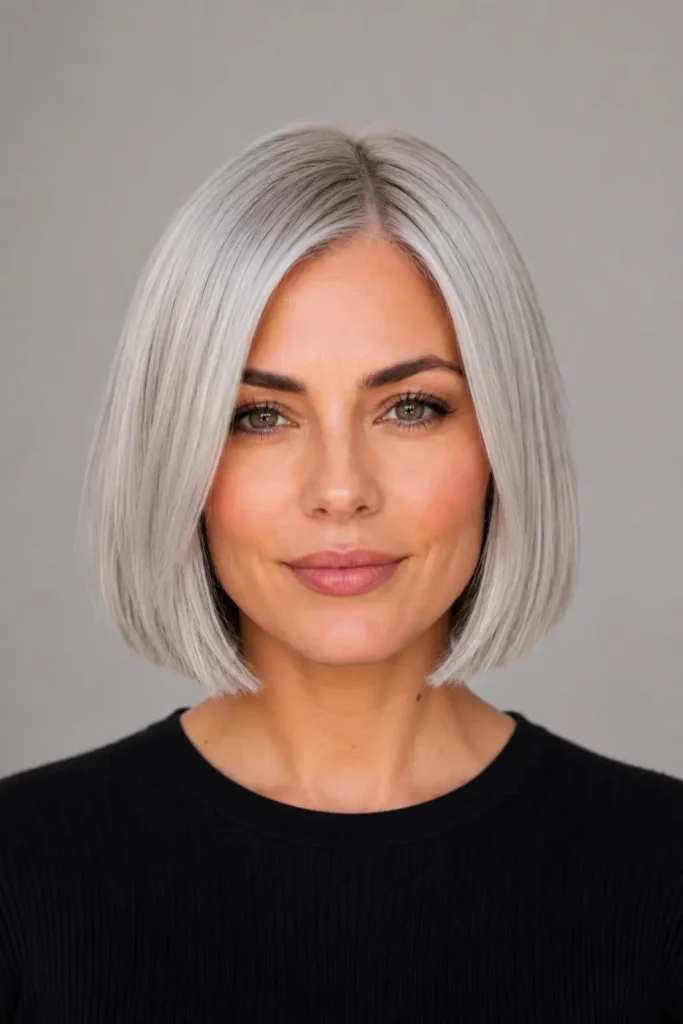
This one is controversial in gray-hair circles because blunt cuts have a reputation for looking thin on, well, thin hair. I tried it anyway after seeing it on a friend with similar density, and the trick is the angle. Cut slightly shorter in back and longer toward the chin, it creates a curve that fakes fullness.
A blunt bob is unforgiving of fraying ends, so I get mine trimmed every eight weeks, no stretching it to twelve. Skip that, and the line goes ragged fast. I set it with hot rollers rather than a straightener, since a slight bend at the ends reads fuller than pin-straight strands ever do.
6. The Side-Swept Pixie With Longer Fringe
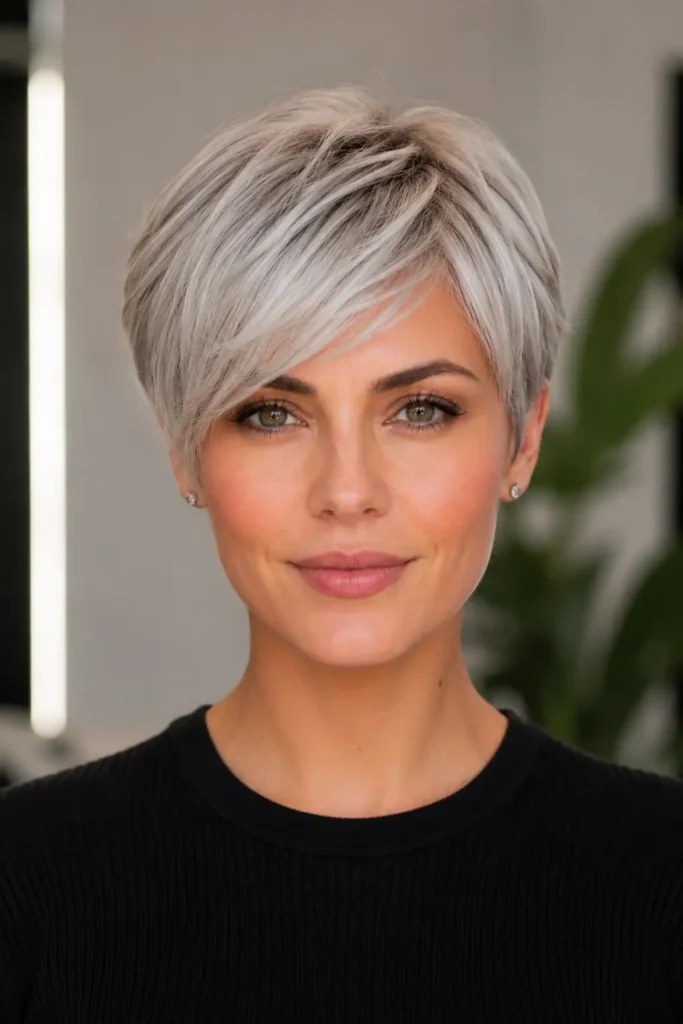
This is the pixie I switched to after the buzzed-short version felt too exposed at my temples. Keeping a longer, side-swept fringe gives you something to style around on flat days, and it softens a face shape that a blunt pixie fringe can sometimes harden, especially once hair has gone fully silver.
I learned the hard way that this cut needs a light styling cream, not a heavy pomade, which weighs fine fringe into stringy pieces by noon. A dime-size amount of It’s a 10 Miracle Leave-In, combed through damp hair before a quick blow-dry, keeps the fringe moving instead of pasted to my forehead.
7. The Layered Crop
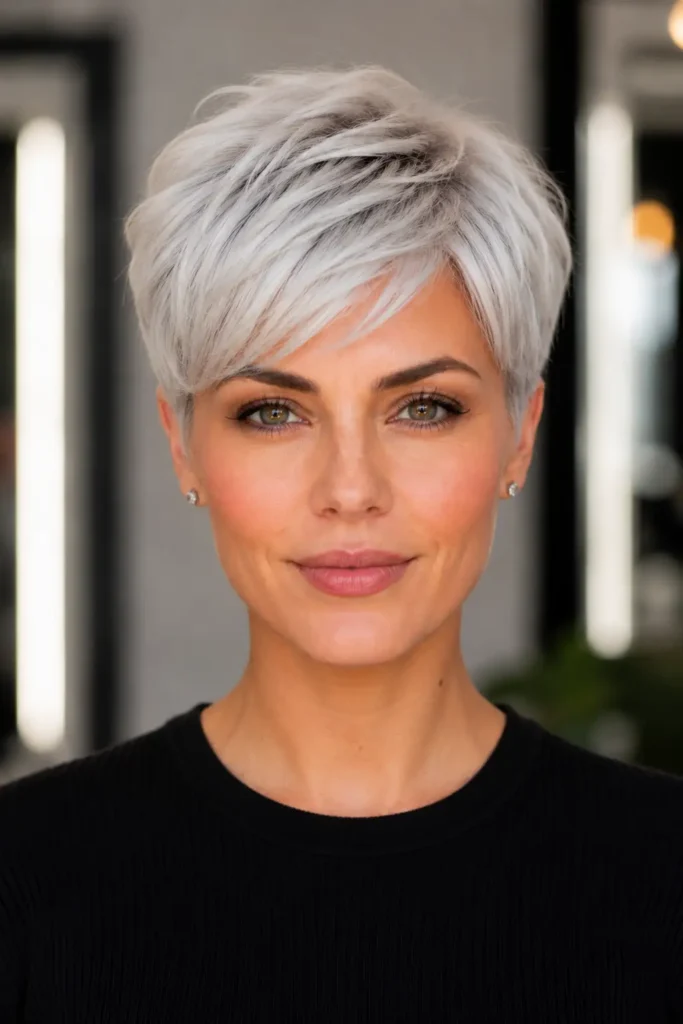
A layered crop is shorter than a pixie everywhere except the crown, where the stylist leaves enough length to comb upward and back. I wore this cut through one entire summer, and it became my go-to for humid days, since there’s almost nothing for moisture to frizz or flatten compared to longer styles.
One mistake worth mentioning: I asked for it too tight around the ears the first round, and it grew out awkwardly within three weeks. Now I ask for slightly looser sides so the shape holds longer between appointments. A root-lifting mousse, like Living Proof Full, applied only at the crown, keeps height through the day.
8. Soft Waves With Volumizing Layers
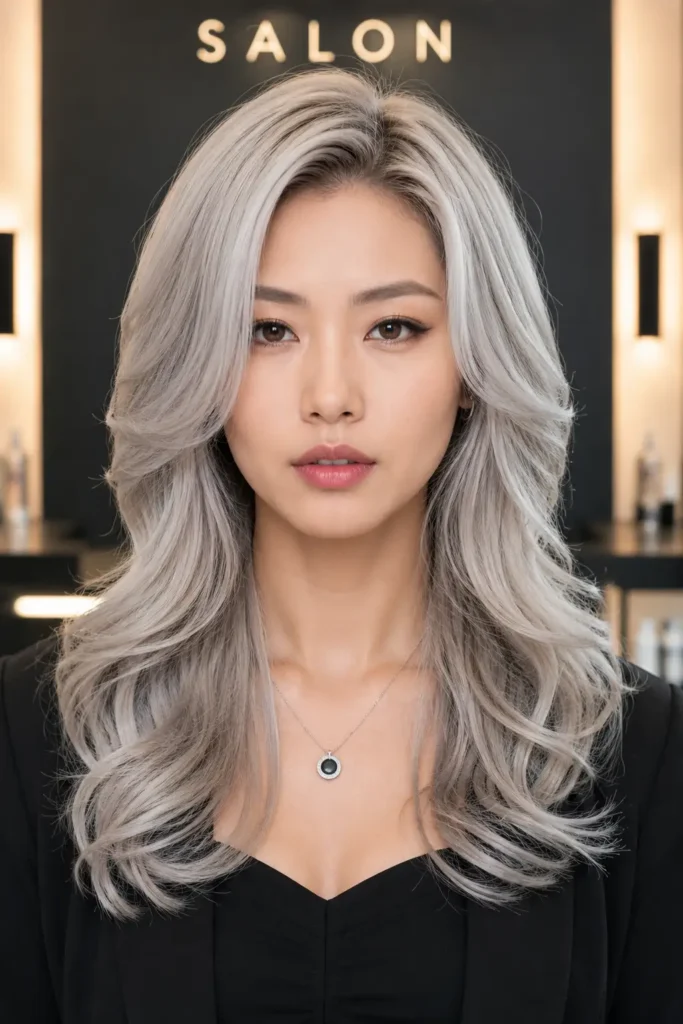
If you’re not ready to cut length but want more visible body, this combination worked best for me before I eventually went shorter anyway. Medium layers throughout, paired with loose waves set on a one-inch curling iron, fill out the silhouette without removing the length it took years to grow back after going gray.
A common question here is whether curling thin gray hair damages it faster than straight styles. Heat is heat, regardless of texture, so the real protection is a heat spray every single time, no exceptions, plus alternating curling days with air-dry days so the hair gets a break to recover its moisture.
9. The Asymmetrical Bob
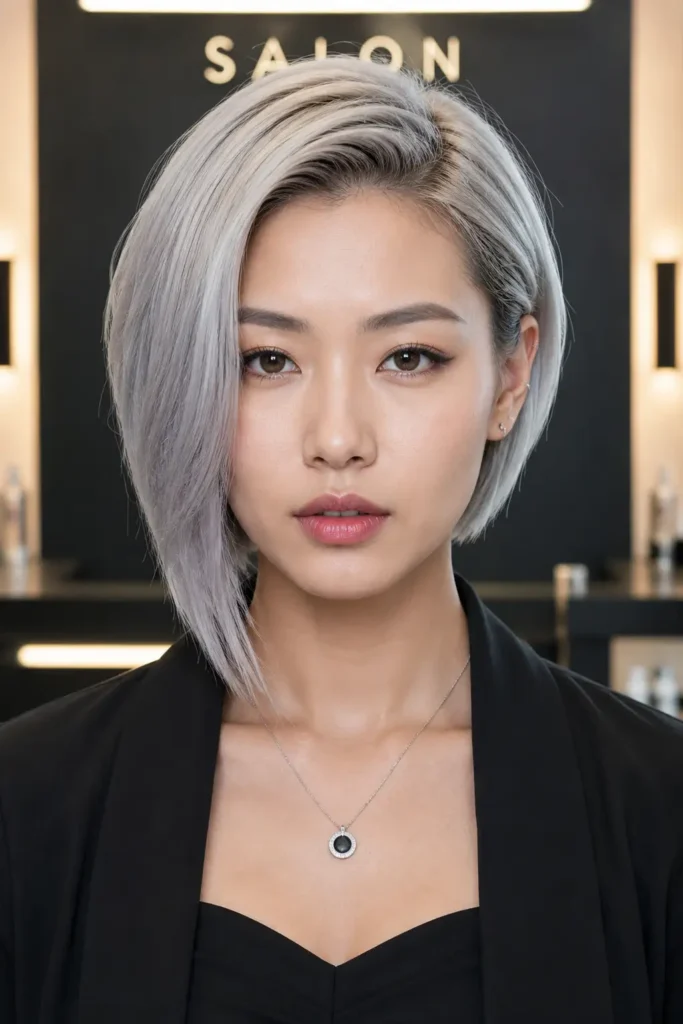
An asymmetrical bob, shorter on one side and longer on the other, sounds like it would unbalance thin hair further, but it actually distracts the eye from density and toward shape instead. I wore mine for almost two years and got more compliments on this single cut than any other style on this list.
The catch is upkeep. Asymmetry grows out unevenly, and what looked sharp at six weeks looked sloppy by week ten. I committed to trims every five to six weeks to keep the angle crisp. Styling is simple: blow-dry with a paddle brush toward the longer side, then a light shine serum to finish.
10. Cropped Curls for Naturally Curly Gray Hair
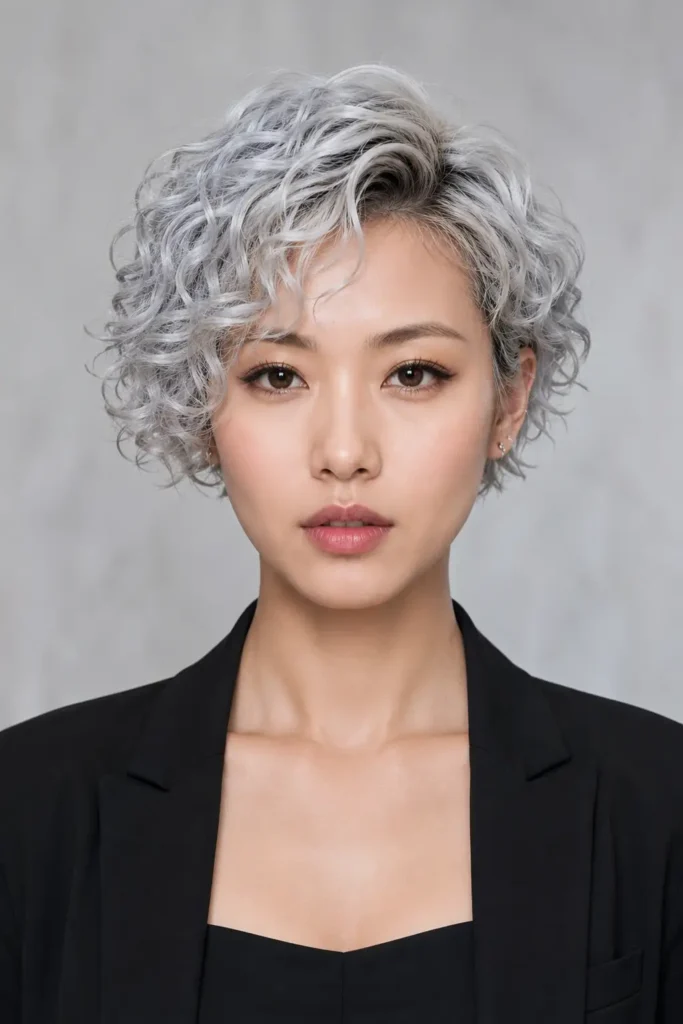
If your gray came in with natural curl or wave, cutting it short into a curl-by-curl crop is one of the most underrated hairstyles for thin fine gray hair. Curl adds visual volume straight strands can’t fake, and keeping it short stops the curl from stretching out under its own weight by afternoon.
My biggest early mistake with curly gray hair was brushing it dry, which breaks up the curl pattern into frizz. Now I detangle only in the shower with conditioner in, then scrunch in a curl cream and either air-dry or diffuse on low heat. The difference in definition was honestly dramatic.
11. Feathered Layers, Updated for Today
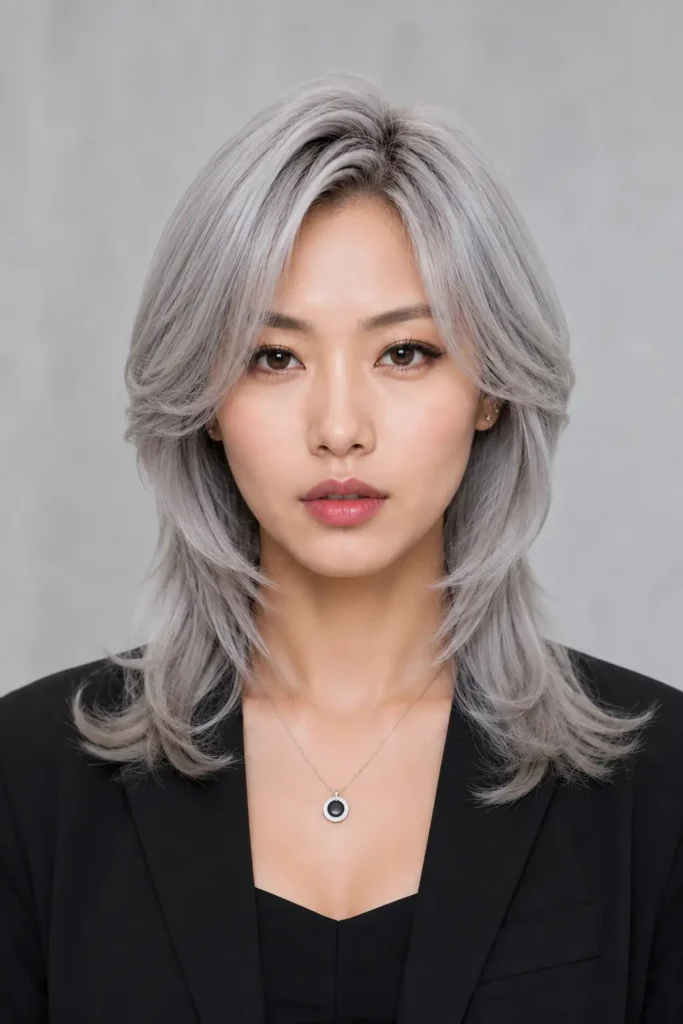
Feathered layers had a moment decades ago, and I was nervous bringing the idea up to my stylist since old photos look dated fast. The modern version is softer, with feathering concentrated around the face rather than the whole head, framing thin fine gray hair without the heavy, helmet-like layering of the original trend.
This style lives or dies on the blowout. I use a round brush and rotate it outward at the ends while directing warm air downward, never straight at the scalp, which can make fine hair look flyaway instead of feathered. A flexible-hold spray at the very end keeps shape without stiffness.
12. The Undercut Pixie
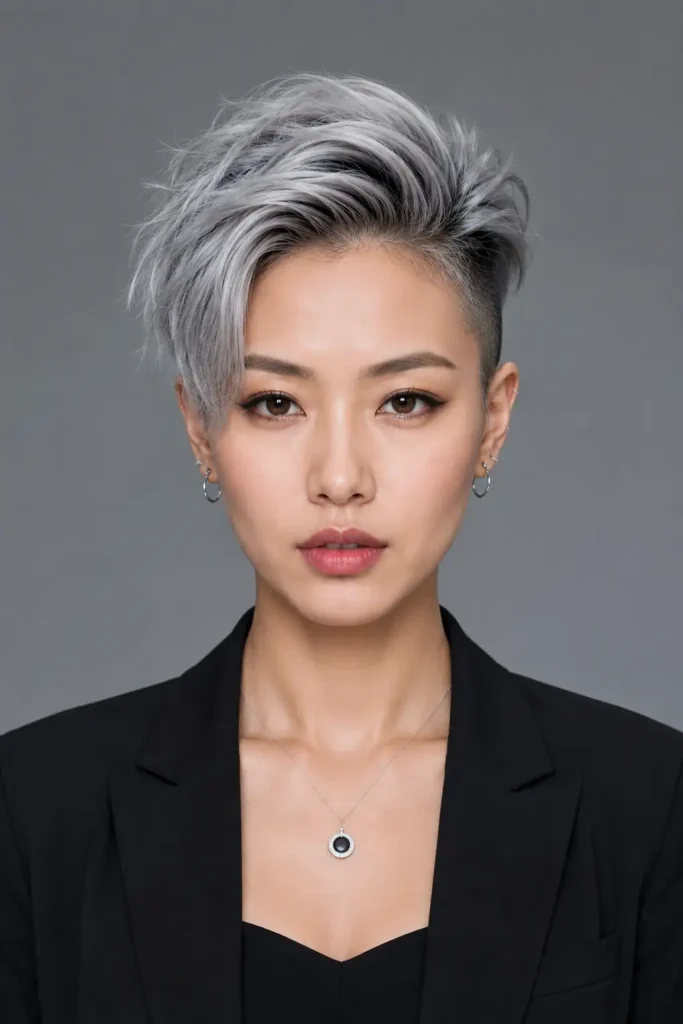
This is the boldest entry on the list, and honestly, I only tried it because a client of mine, a retired teacher in her sixties, talked me into watching her get it done. Shaving the underside short while leaving longer, textured length on top creates contrast that makes the top read fuller by comparison.
It’s not low-maintenance the way people assume. The shaved sections need a touch-up every three to four weeks to avoid looking patchy and grown-out. If you’re not committed to that schedule, skip this one. For the right person, though, it’s one of the most striking hairstyles for thin, fine gray hair I’ve seen worn well.
13. The Wavy Lob With Face-Framing Layers
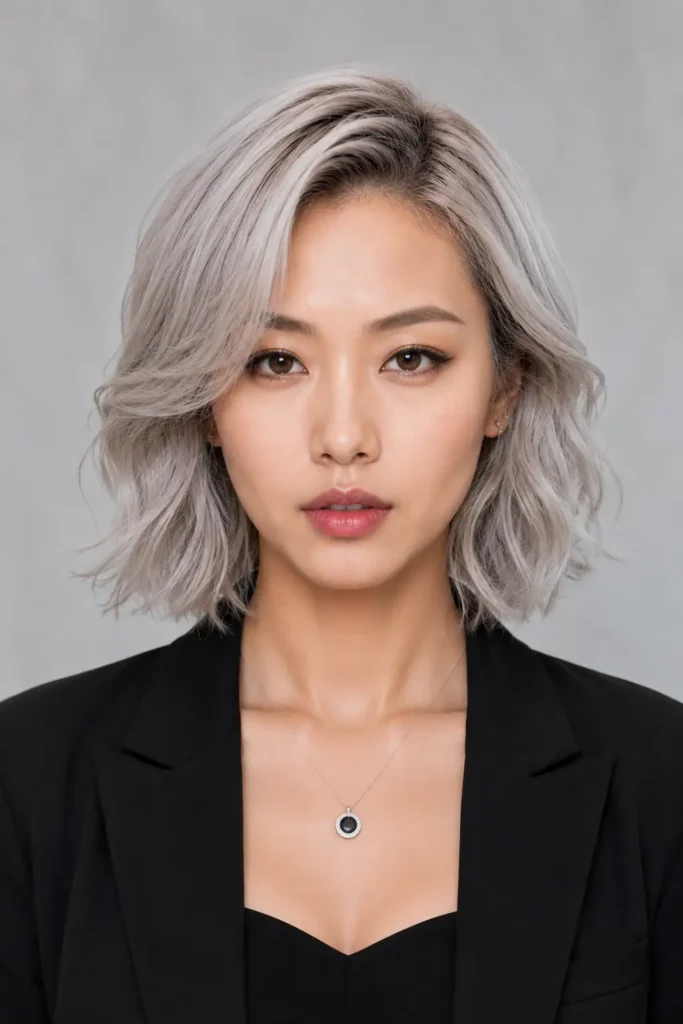
Combining a long bob with loose waves and face-framing layers became my favourite “in-between” style during the two years I spent deciding whether to cut shorter or grow it out. The face-framing pieces draw attention upward toward the eyes, which works especially well once gray starts looking more silver-white near the hairline.
I style this with a one-inch wand, curling away from the face, then run fingers through once the curls cool to break them into looser waves. Tight curls left untouched can look like a wig on fine hair. Loosened waves, on the other hand, look more like natural texture and movement.
14. Blunt Cut With Curtain Bangs
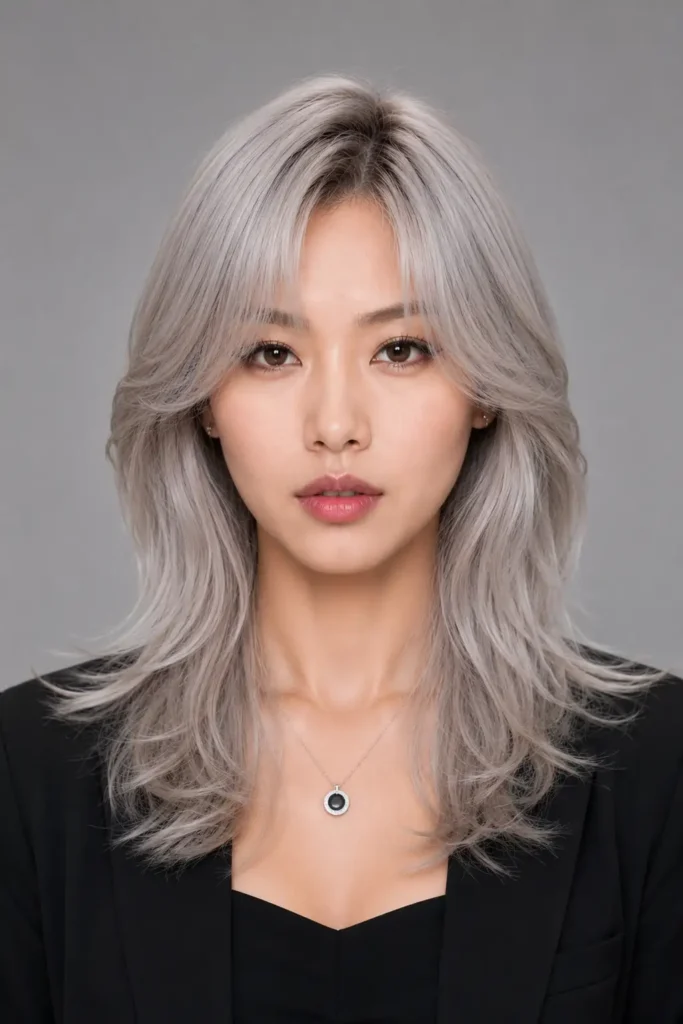
Curtain bangs split down the middle and swept to each side became unexpectedly popular with my gray-haired clients over the past couple of years, mostly because they’re easy to grow out if you change your mind, unlike a full fringe. Paired with a blunt mid-length cut, they soften the face without full commitment.
The mistake almost everyone makes is cutting curtain bangs too short the first time, copying a photo where the model has thicker hair. Ask for them slightly longer than you think you want, since fine-hair bangs always look shorter once styled than they do wet on the cutting room floor.
15. The Short Shag With Bangs
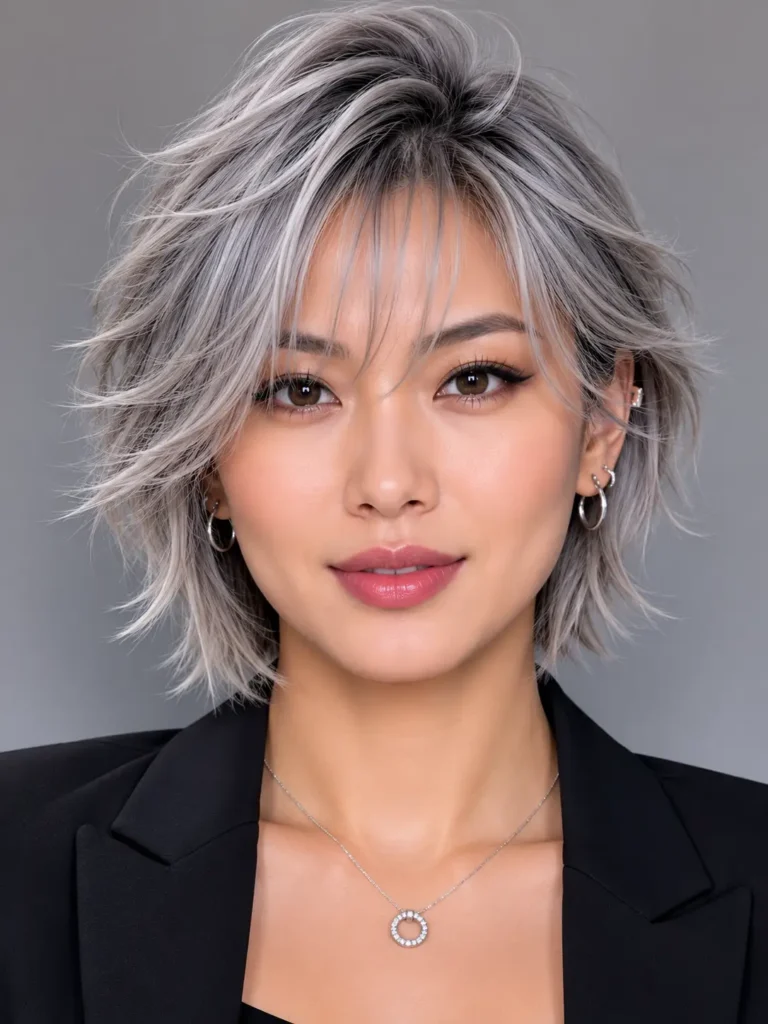
Pairing a short shag with full, textured bangs gave me one of the lowest-maintenance styles I’ve tried. The shaggy layers do most of the volumising work on their own, so I spend less time blow-drying than I did with smoother cuts, mostly just rough-drying with fingers and a texturising spray.
A reader once asked whether bangs make thin hair look thinner by drawing attention to the hairline. It depends on the thickness. Wispy, broken-up bangs hide a receding hairline better than thick, blunt ones, which can look sparse fast on fine strands. I keep mine textured with point-cutting for exactly that reason.
16. Root-Lift Layers for Crown Volume
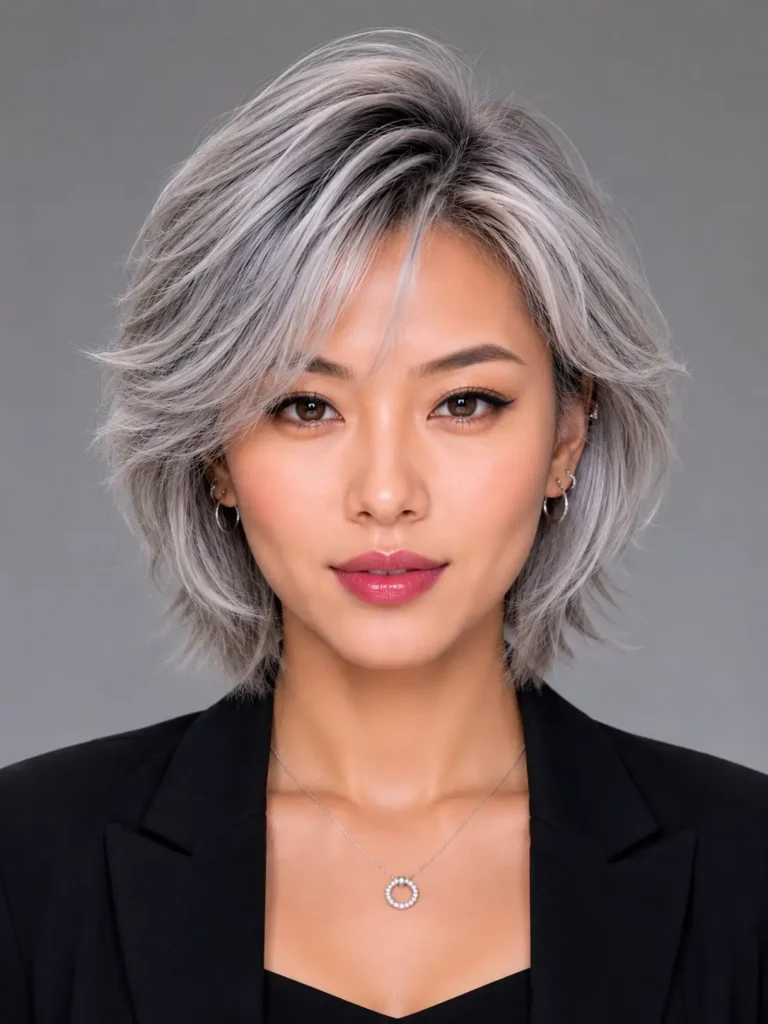
This isn’t really a separate haircut so much as a cutting technique, but it deserves its own spot because it solved my biggest complaint: a flat, thinning crown. The stylist cuts short, internal layers only at the crown’s root, invisible once grown out, but enough to make hair stand up rather than lie flat.
I pair this with a blow-dry technique, not just product. Clip the top section up, dry the underneath first, then drop the top down and blow-dry it backward against its natural fall before brushing into place. That backward drying step alone made a bigger visible difference than any mousse I’ve bought.
17. The Sleek One-Length Bob
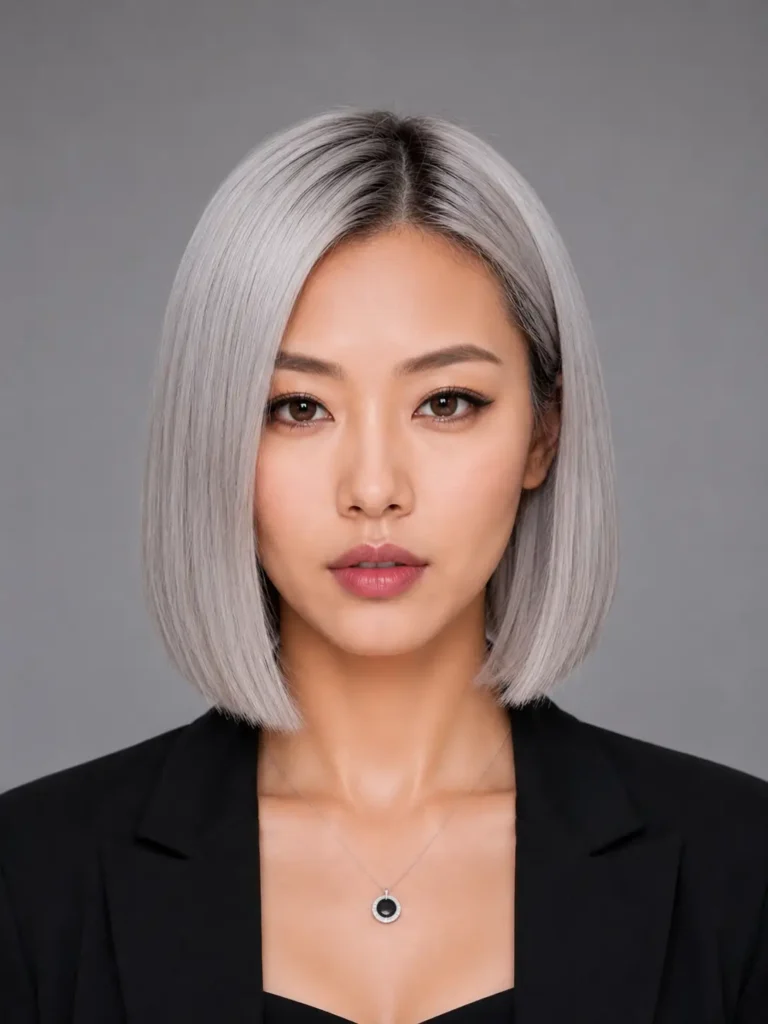
After years of layers, I went the opposite direction for a while and tried a completely one-length, sleek bob, blow-dried pin-straight. I expected it to look thin and flat, and on day one it almost did, but a glossy, polished finish on fine gray hair reads expensive rather than sparse once styled correctly.
The key product here was a shine serum, not a volumizer. Color Wow Dream Coat, applied to towel-dried hair before blow-drying, gave it the glassy finish that made the cut look intentional rather than limp. Skipping that step, and just air-drying instead, was the one time this style genuinely looked thin to me.
18. The Tapered Nape Pixie
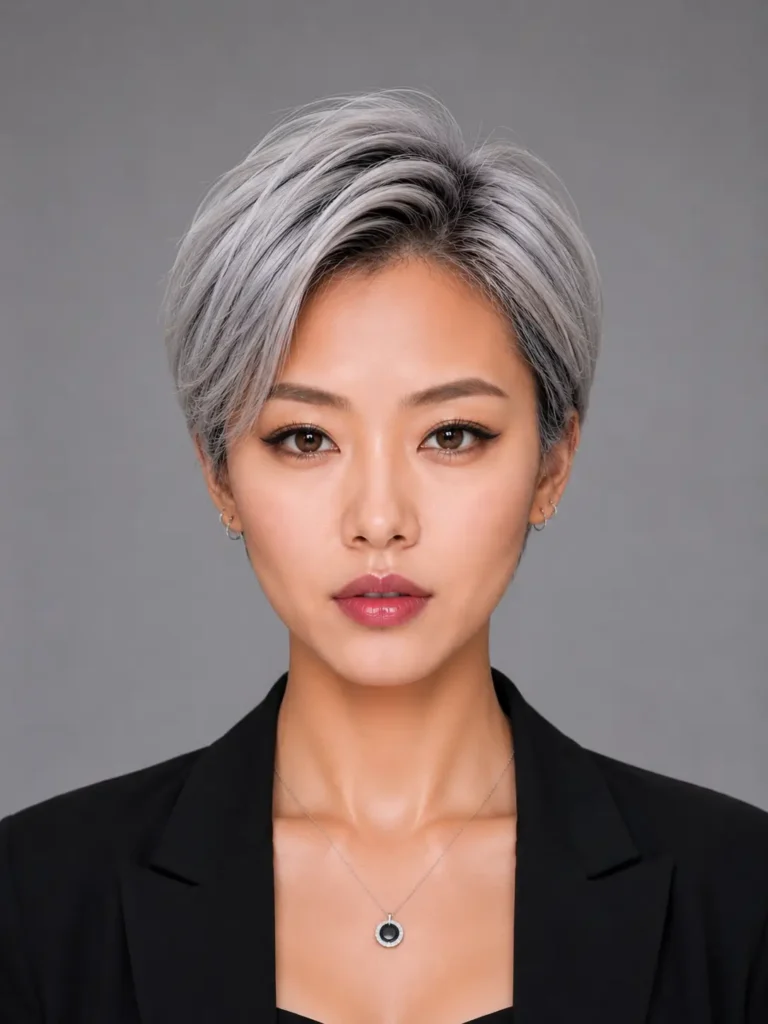
A tapered nape, where the back is cut close and gradually blends into longer length up top, solved a problem I didn’t know I had: a thick, bulky-looking neckline that made the rest of my fine hair look thinner by contrast. Tapering it close made the whole silhouette feel proportionate again.
This cut needs trims more often than people expect, every three to five weeks, because the tapered section grows out fastest and starts looking shaggy at the neck first. If frequent salon visits aren’t realistic for you, ask your stylist about a looser taper that stretches a little longer between visits.
19. Soft Layered Shoulder-Length Cut
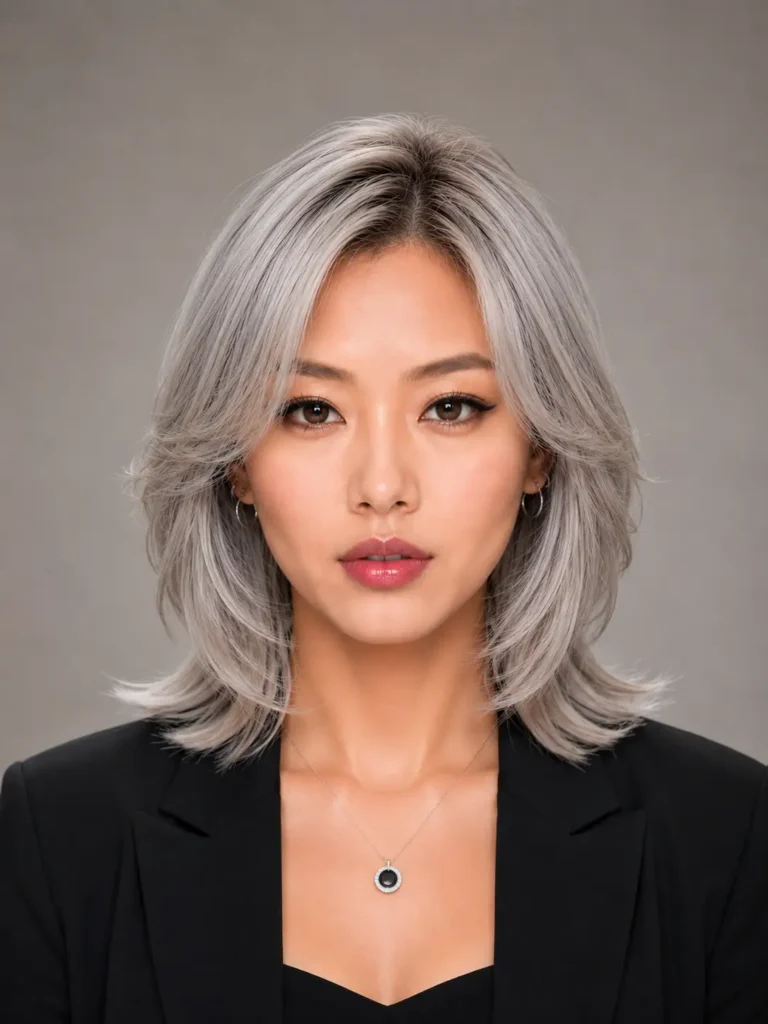
For anyone not ready to go short at all, this medium-length cut with soft, face-framing layers was my compromise style for almost three years. It kept enough length for a half-up clip on bad days, while layering near the face prevented the heavy, flat curtain look thin hair tends toward past the shoulders.
Past shoulder length, fine gray hair almost always needs some layering, in my experience, or the ends look stringy no matter how healthy they are. I get layers refreshed every other trim, roughly every twelve weeks, and use a volumizing mousse at the roots before any blow-dry, never just at the ends.
20. Textured Crop With a Deep Side Part
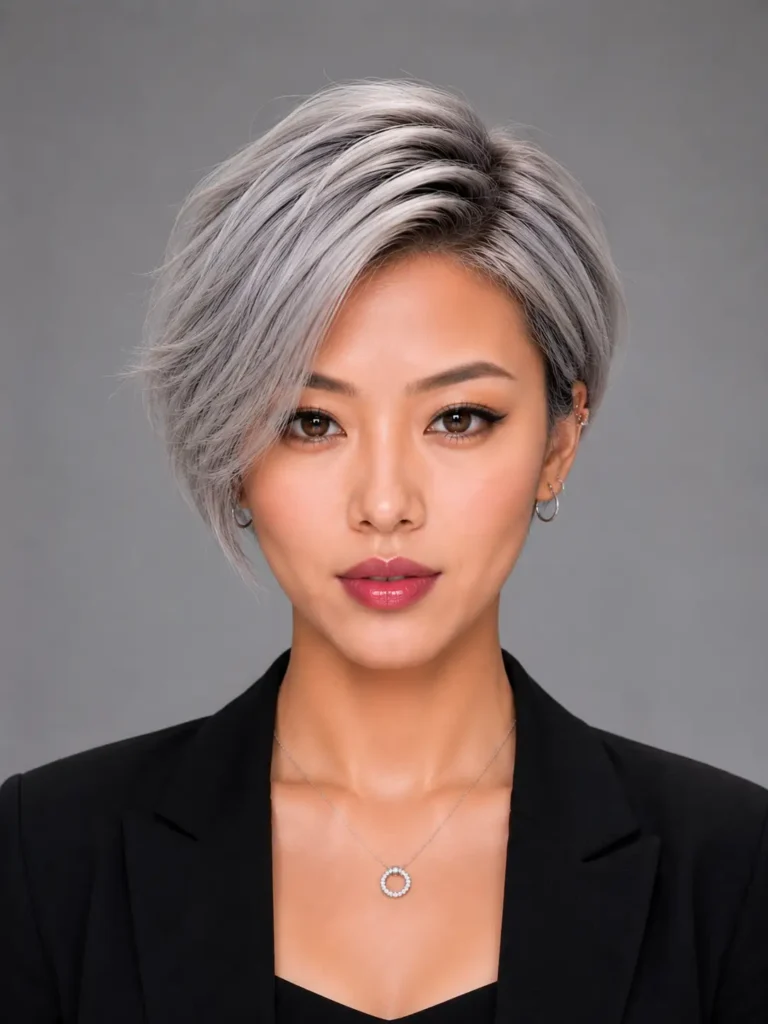
Moving my part from the centre to a deep side part changed how this short, textured crop looked more than any cutting technique did. A deep side part naturally creates the illusion of more volume at the root, since hair has to lift and cross over itself to cover the wider section.
I switch my part every few months anyway, since a hairline parted the same way for years can develop a visibly thin line where it’s combed daily. Alternating sides occasionally gives that section a rest and lets it recover some fullness, something my longtime stylist actually pointed out to me first.
21. Silver Balayage on a Layered Cut
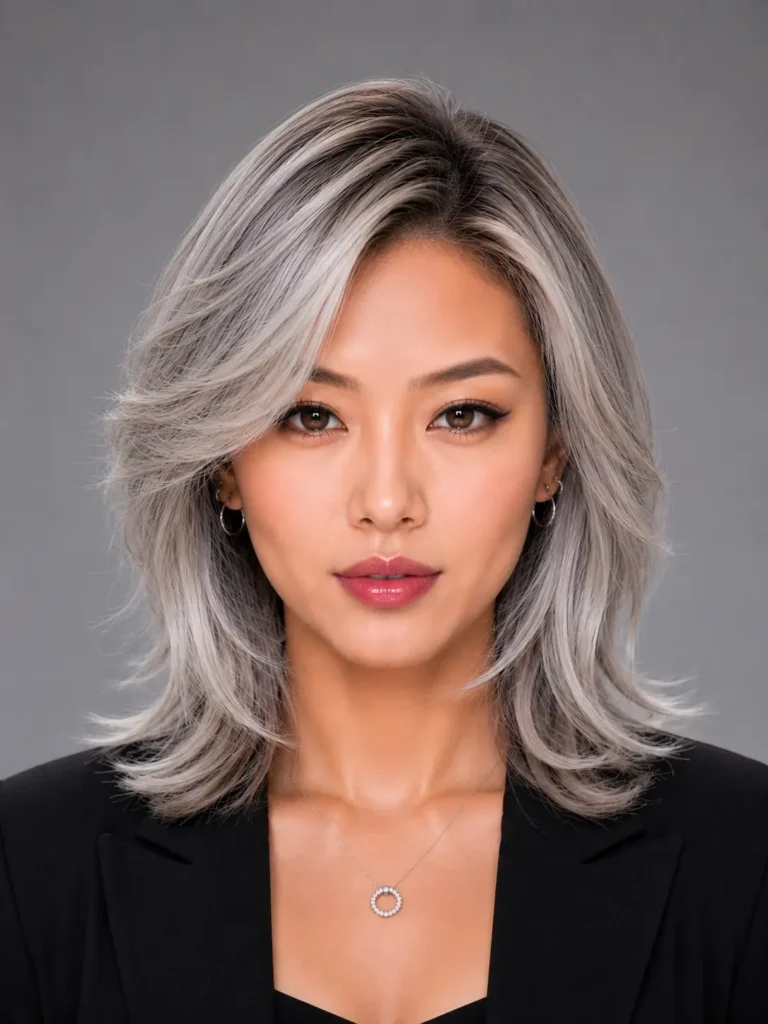
This is the only entry on the list that’s about color as much as cut, but I’m including it because the combination genuinely changed how thick my hair looked, more than any single haircut alone managed. Soft, low-lift balayage in varying tones of silver and white adds dimension flat, single-tone gray can lack.
The mistake I see most is going too high-contrast, with chunky, bright white pieces that look more like highlights than natural gray growth. A soft, blended balayage, done by someone experienced specifically with gray and silver tones, looks like dimension your hair grew naturally, not color applied on top of it.
Finding the Right Fit for Your Own Hair
Twenty-one styles is a lot to consider, and you don’t need to try them all. What actually moved the needle for me wasn’t a single magic cut; it was finding a stylist willing to keep adjusting the layering and length until the proportions matched my actual head shape, not a photo from someone else’s hair texture.
If there’s one thing worth taking from all this trial and error, bring reference photos, but also bring a willingness to let your stylist talk you out of a style that won’t suit your density. The cut that finally worked best for me wasn’t even the one I walked into the salon asking for.

Sarah Williams
Hi, I’m Sarah Williams — the founder of HerStyleNest, where beauty meets modern style. I share trendy hairstyles, chic nail designs, and fashion inspiration for women who love staying stylish every season. From everyday elegance to viral beauty trends, HerStyleNest is your go-to destination for effortless fashion and beauty ideas.

Pingback: 27 Polka Dot Nails Ideas You'll Love | Cute & Trendy Designs
Pingback: Warm Caramel Balayage With Honey Highlights Ideas For A Stunning Look