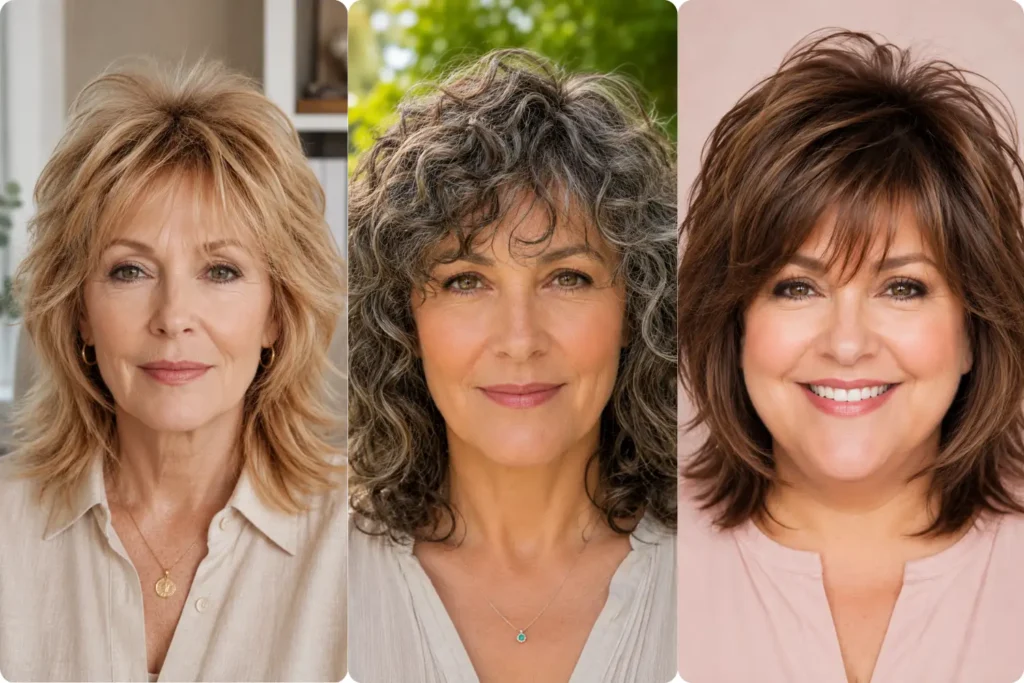

22 Shaggy Hairstyles for Older Women That Look Expensive, Not Ageing
I’ve cut hair for almost eighteen years, and if there’s one style I keep landing on for clients over fifty, it’s the shag. Not the choppy, slightly mullet-y version that scared people off in the 2000s — the updated, softer take that moves well in real light, not just under salon bulbs. I used to assume shags belonged to twenty-somethings. My regulars proved me wrong fast.
Here’s what changed my mind: a longtime client, gray for three years and frustrated with flat, lifeless lengths, asked me to “do something, anything” before her daughter’s wedding. I gave her a soft shag with curtain layers around the face. Six weeks later she texted me a photo from a work trip — strangers had asked where she got her hair done. That’s the shag effect.
1. The Classic Layered Shag
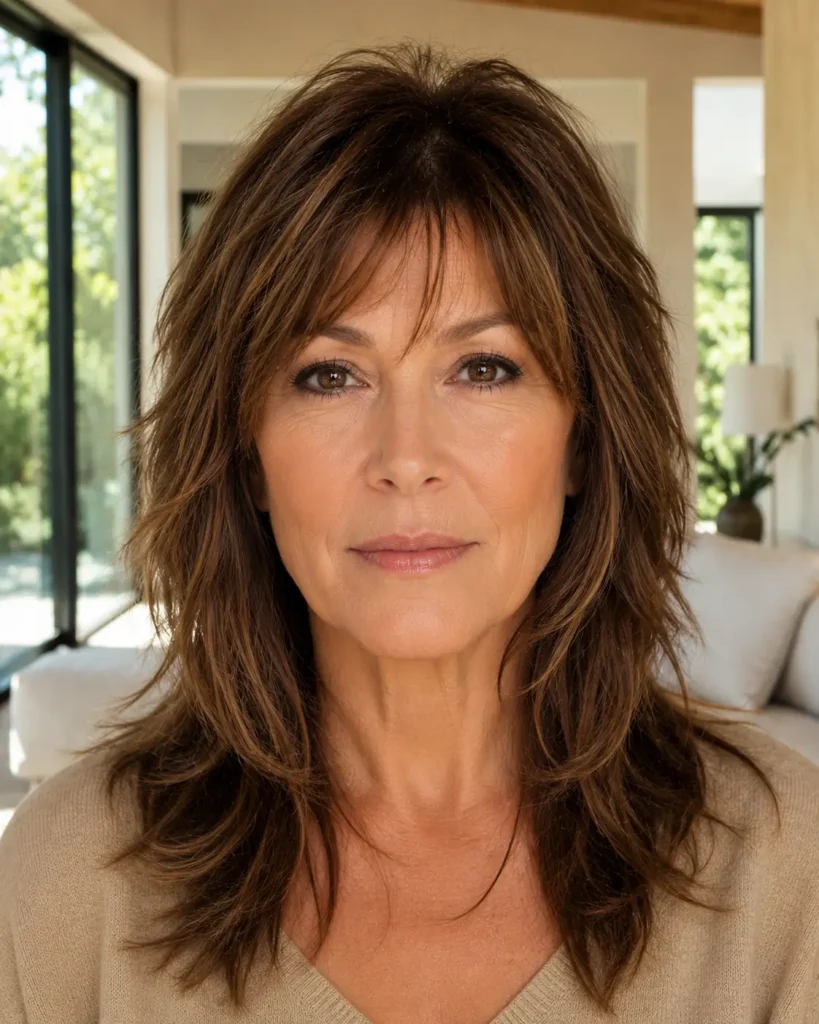
This is the shag I default to for first-timers. Long layers start around the cheekbone and get shorter toward the crown, which adds lift without chopping length off. It works on shoulder-length to mid-back hair and suits almost every face shape. My only warning: ask for layers cut with a razor or point-cutting shears, not blunt shears, or the ends look stiff instead of soft.
2. The Silver Fox Shag
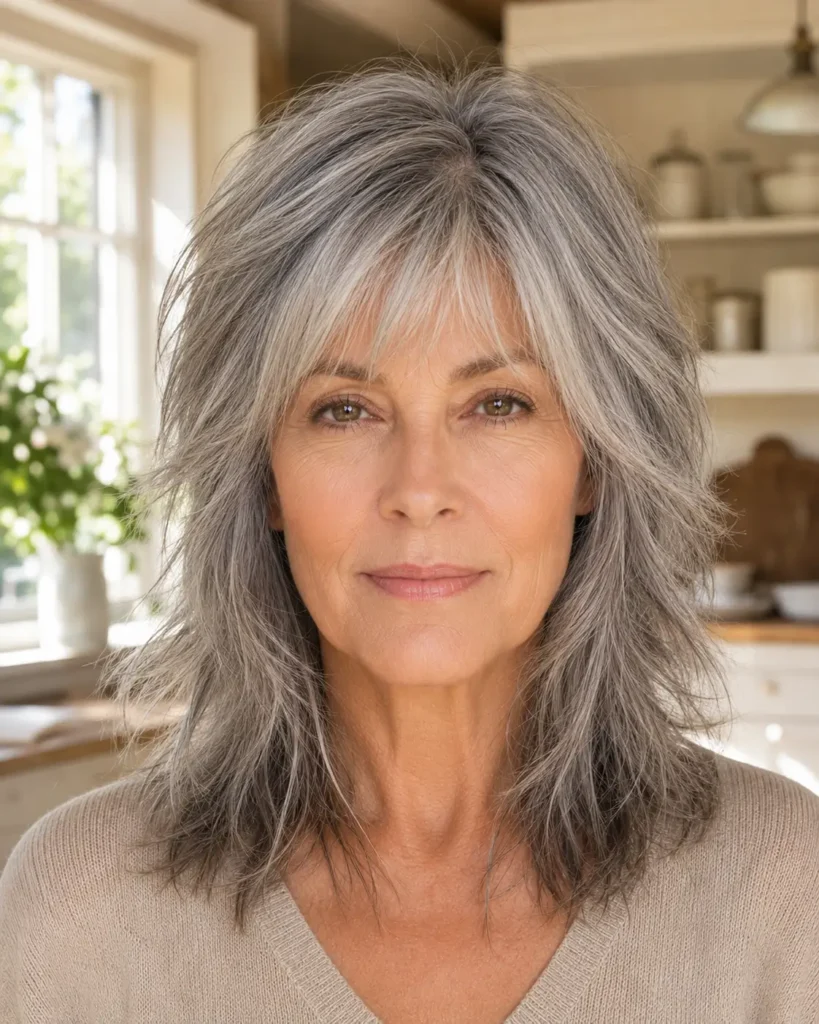
Gray hair holds shag layers beautifully because the lack of pigment makes texture more visible, not less. I tell clients going silver to wait until they’re at least seventy percent gray before cutting in heavy layers, otherwise the line between dyed and natural hair fights the haircut. Pair it with a gloss treatment every eight weeks to keep brassiness away.
3. The Curly Shag for Natural Texture
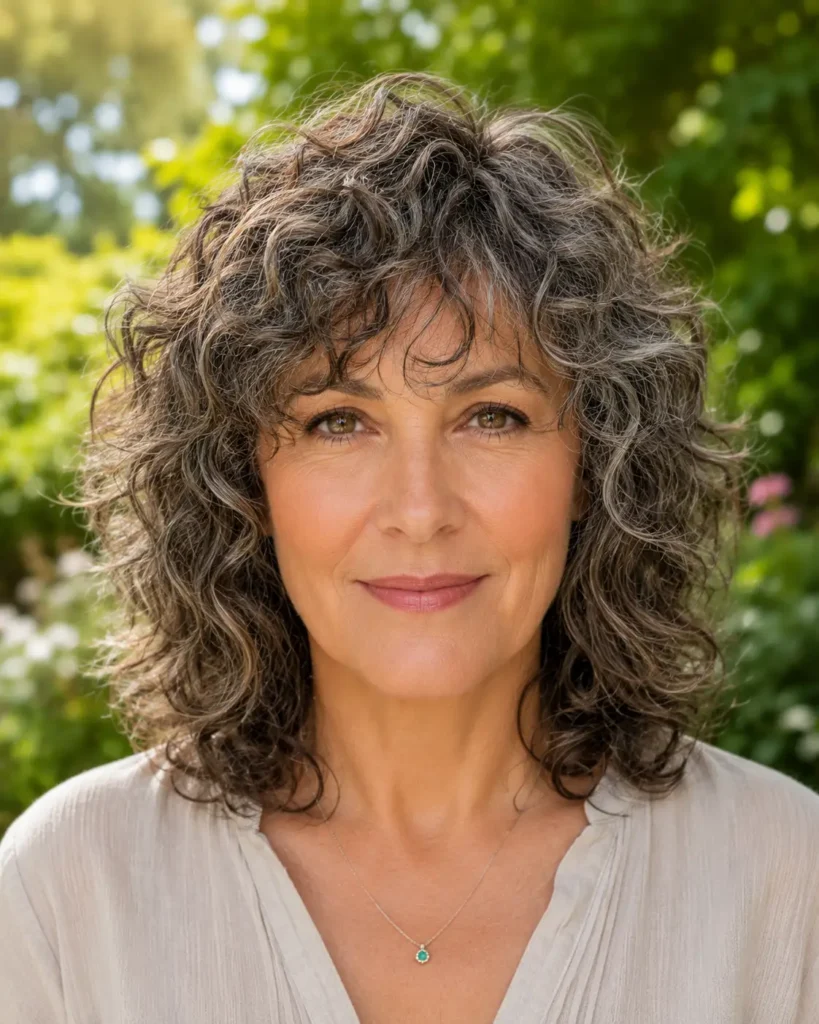
Curly hair and shag layers are a genuinely good match, but only if your stylist cuts it curl by curl, dry, not soaking wet. Cutting curls wet means they spring up shorter than expected once they dry, and a lot of curly-haired clients walk out disappointed for that exact reason. Ask specifically for a dry diffuse-and-cut session if your salon offers one.
4. The Wavy Beach Shag

This is my go-to summer recommendation. Loose layers plus a texturising spray, something like Moroccanoil Dry Texture Spray, give natural waves enough grip to hold shape without crunchy product buildup. It reads relaxed rather than undone, which matters if you’re styling for work and not just weekends. Avoid heavy serums here; they weigh waves flat fast.
5. The Curtain Bangs Shag
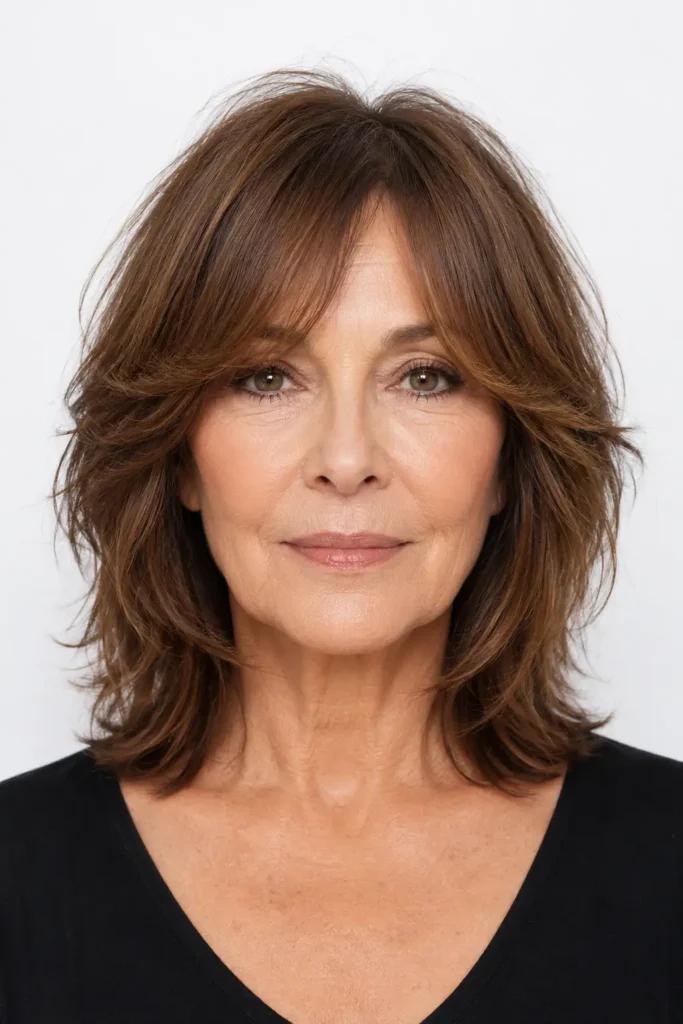
Curtain bangs split down the middle and sweep toward each temple, and they’re the single most requested addition to a shag in my chair right now. They soften a square or angular jawline almost instantly. The catch: they need a quick trim every three to four weeks, or they grow into your eyes and stop doing their job entirely.
6. The Pixie Shag
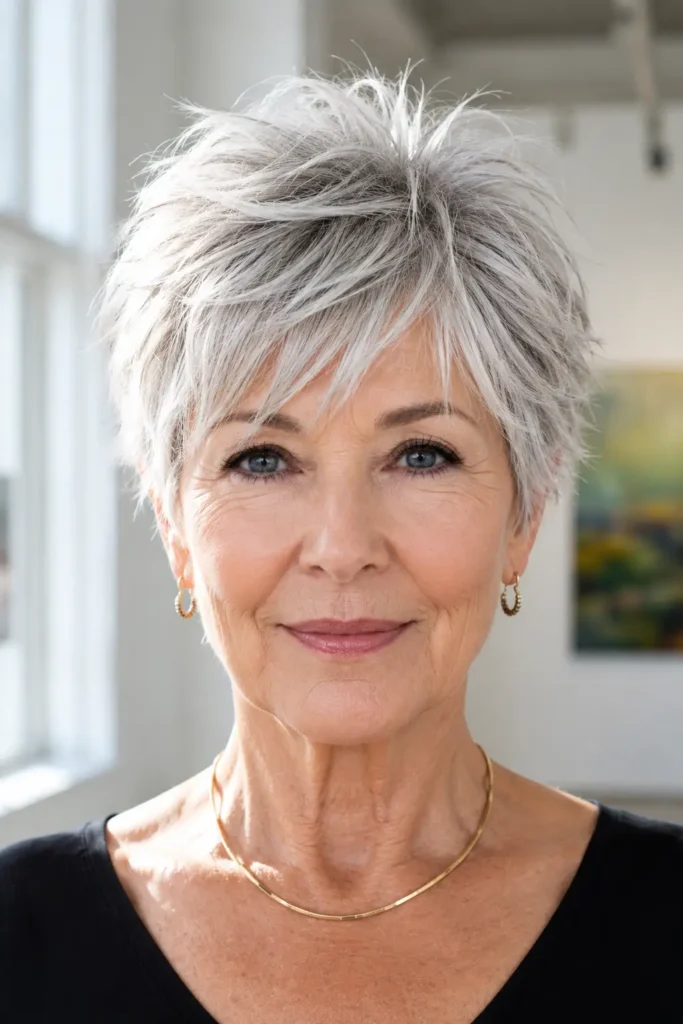
A shaggy pixie keeps the cropped length but adds choppy, uneven layers on top instead of one smooth shape. It’s my favourite low-maintenance recommendation for clients who are done with daily styling. A pea-sized amount of texturising paste rubbed into damp roots, something like Bumble and bumble Sumotech, gives it lift in under two minutes flat.
7. The Bob-Length Shag

A shag cut into bob length, usually chin to collarbone, gives you the low-commitment length of a bob with the movement of a shag. It’s the cut I recommend most for first-time layer clients who are nervous about committing. Ask for layers that start no higher than the cheekbone so the bob shape doesn’t disappear entirely.
8. The Long Layered Shag
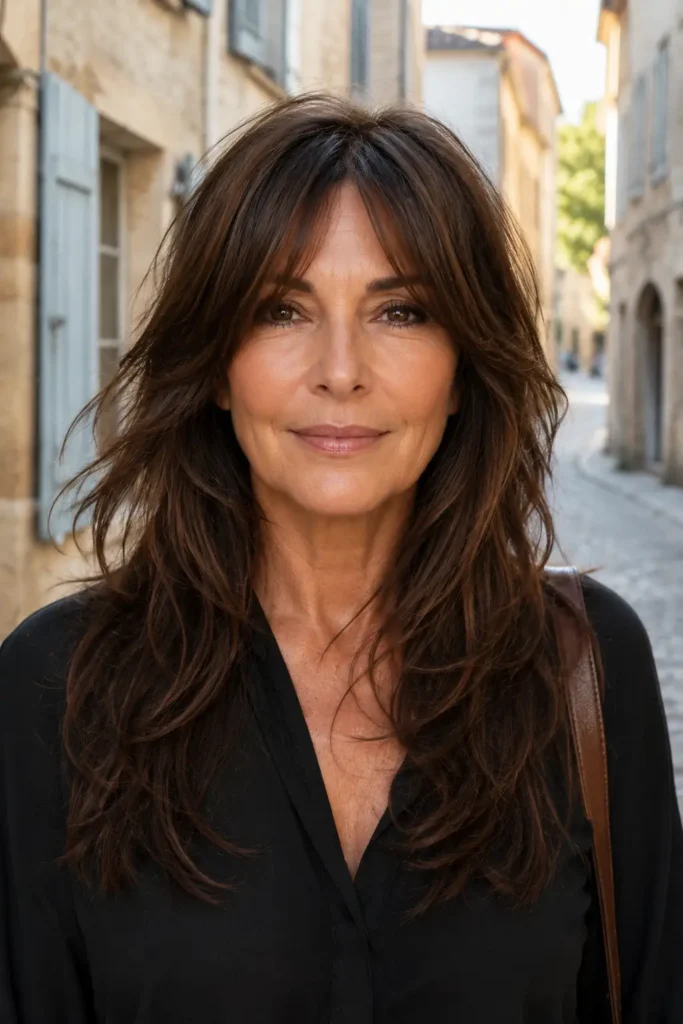
Long shags, anything past the shoulder blades, need the most layers to avoid looking like one heavy curtain. I usually cut at least three distinct layer lengths through the back and sides. It’s a commitment to upkeep, roughly every ten to twelve weeks, but the payoff is hair that swings and moves on camera instead of sitting flat.
9. The Feathered Shag
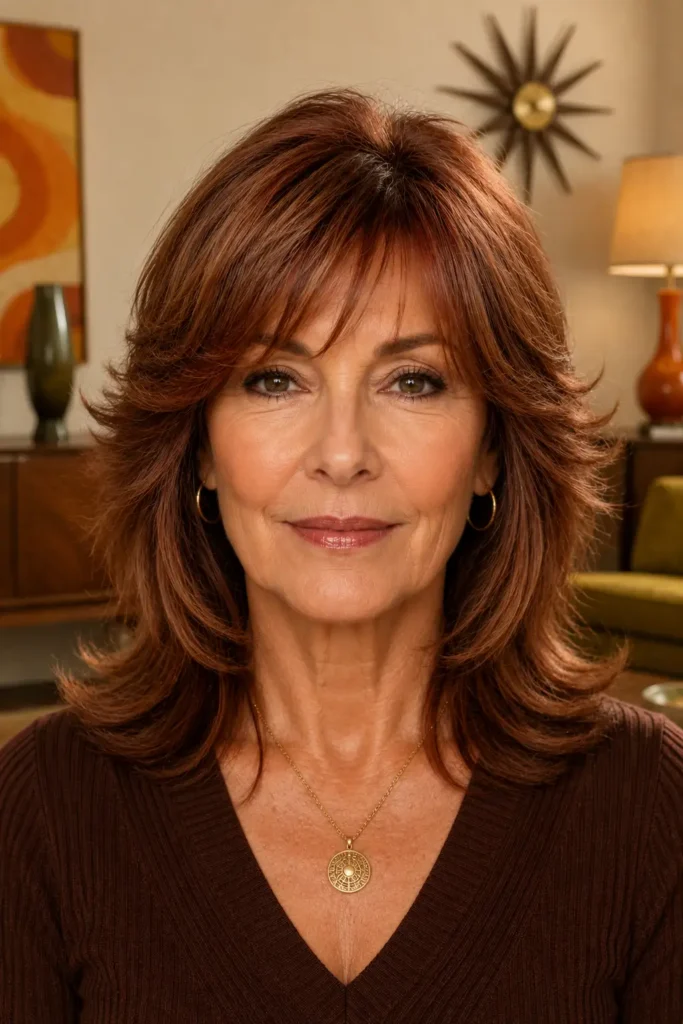
This is the closest a modern shag gets to the original seventies version, with layers that flick outward at the ends instead of curling under. It needs a round brush and a blow-dryer with a concentrator nozzle to get the flip right, so it’s not the most low-maintenance pick here, but it’s unmatched for volume on fine, flat hair.
10. The Choppy Textured Shag
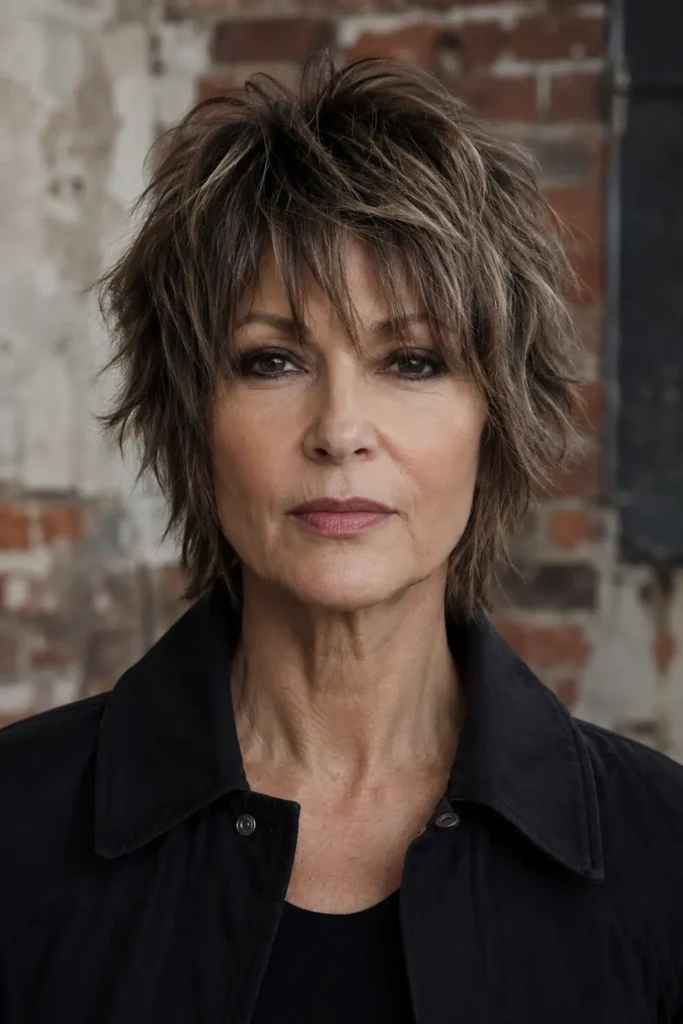
Choppy shags rely on razor cutting rather than scissors, which creates rougher, more broken-up ends on purpose. It looks edgier than the classic shag and tends to suit clients with a more casual personal style. Pair it with a matte texturising cream instead of anything shiny, since shine tends to soften the choppy effect you’re paying for.
11. The Wolf Cut Shag
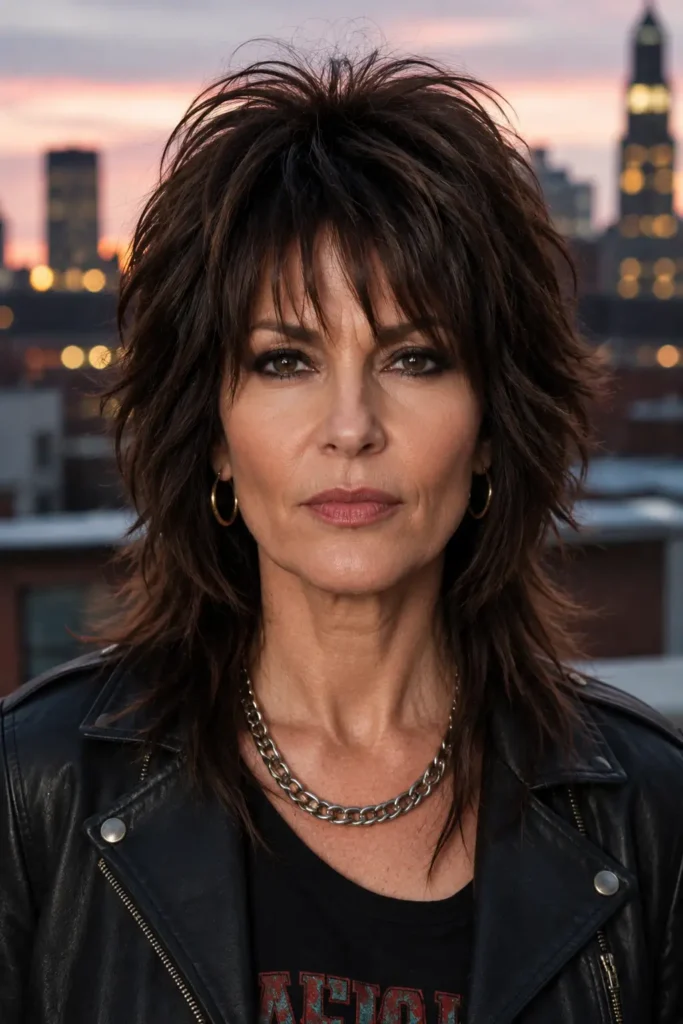
The wolf cut is basically a shag and a mullet that decided to merge: short and heavily layered on top, longer and shaggier toward the ends. It reads younger and edgier than a traditional shag, which is exactly why some of my most fashion-forward fifty- and sixty-something clients request it specifically. It does need more frequent trims to keep the shape from growing out bluntly.
12. The Volume-Boosting Shag for Fine Hair
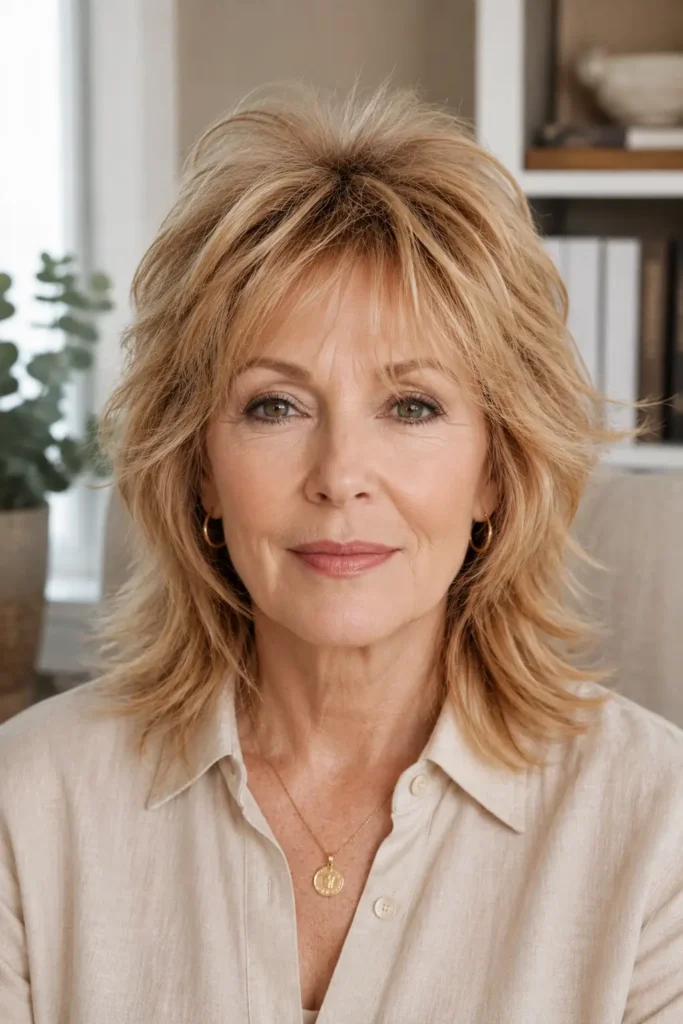
Fine hair and shag cuts can go wrong fast if too many layers are removed at once, leaving hair looking sparse instead of full. My rule for fine-haired clients is fewer, longer layers concentrated at the crown only, plus a root-lifting spray like Living Proof Full applied before blow-drying upside down for thirty seconds. That one step changes the whole result.
13. The De-Bulking Shag for Thick Hair

Thick hair needs the opposite approach: heavy internal layering to remove weight, a shag just sits there like a triangle instead of moving. I think thick hair with point cutting throughout the mid-lengths, never just at the ends. Clients are always surprised by how much lighter their hair feels walking out, and how much easier the next blow-dry is.
14. The Asymmetrical Shag
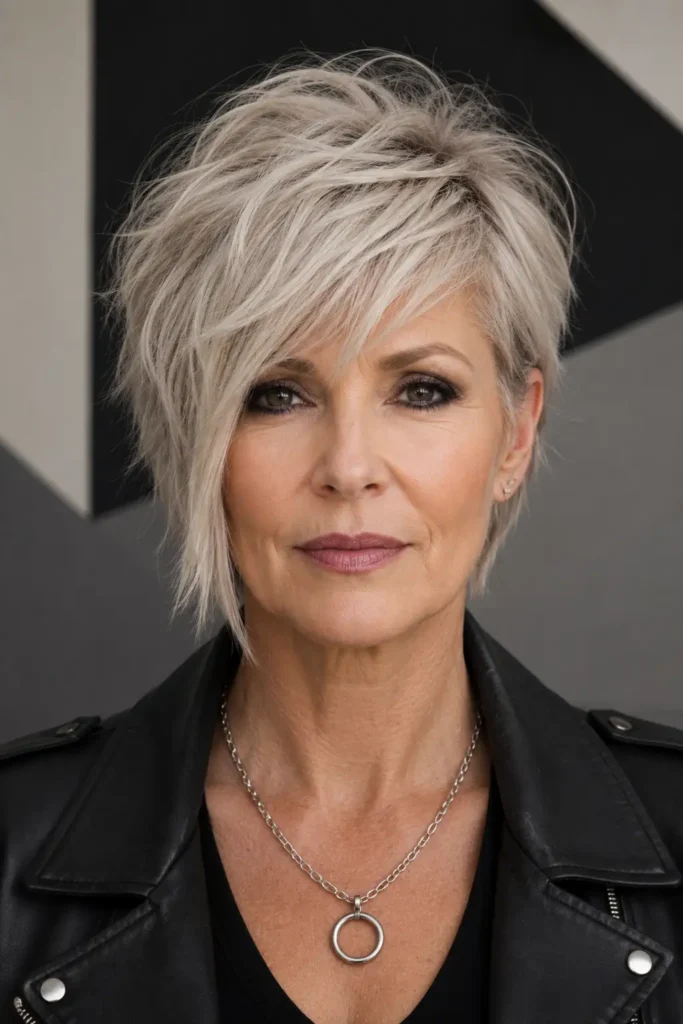
An asymmetrical shag keeps one side slightly longer than the other, usually by an inch or two, which sounds dramatic but reads as subtle once it’s styled. I recommend this mainly to clients who already part their hair deeply to one side, since the cut follows that natural part rather than fighting it. It’s a bolder option, so I always show a photo first.
15. The French Girl Shag
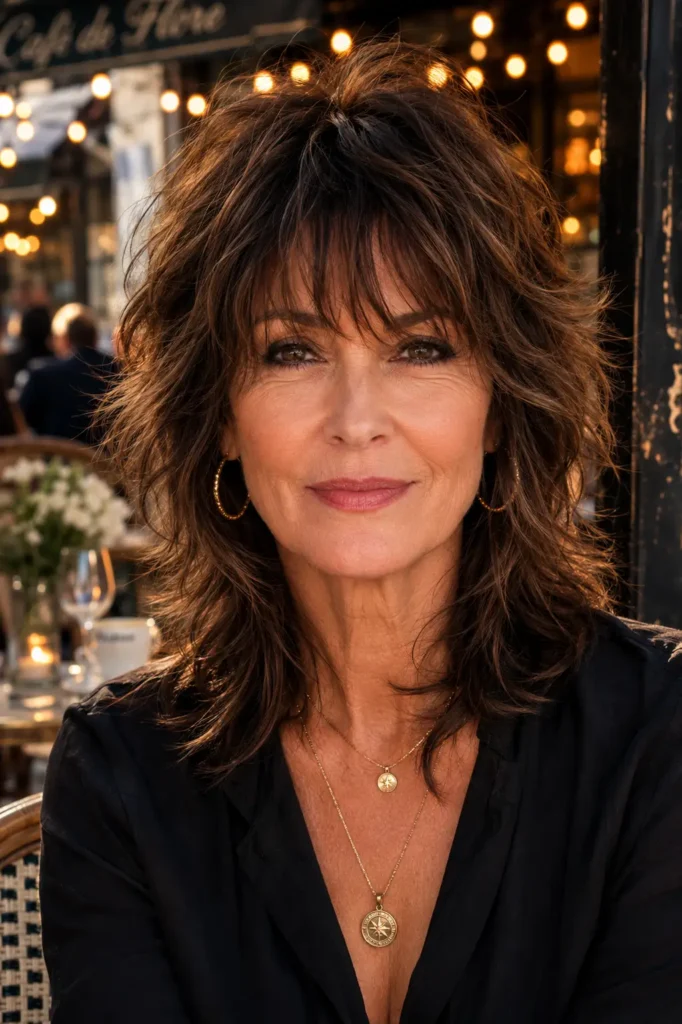
This version looks deliberately undone, almost like you rolled out of bed and it just happened to fall right. The trick is texture, not length: short layers throughout, finished with a few pumps of salt spray and air-dried rather than blow-dried smooth. It’s the lowest-effort shag on this entire list and one of the most requested after a Paris trip.
16. The Butterfly Shag
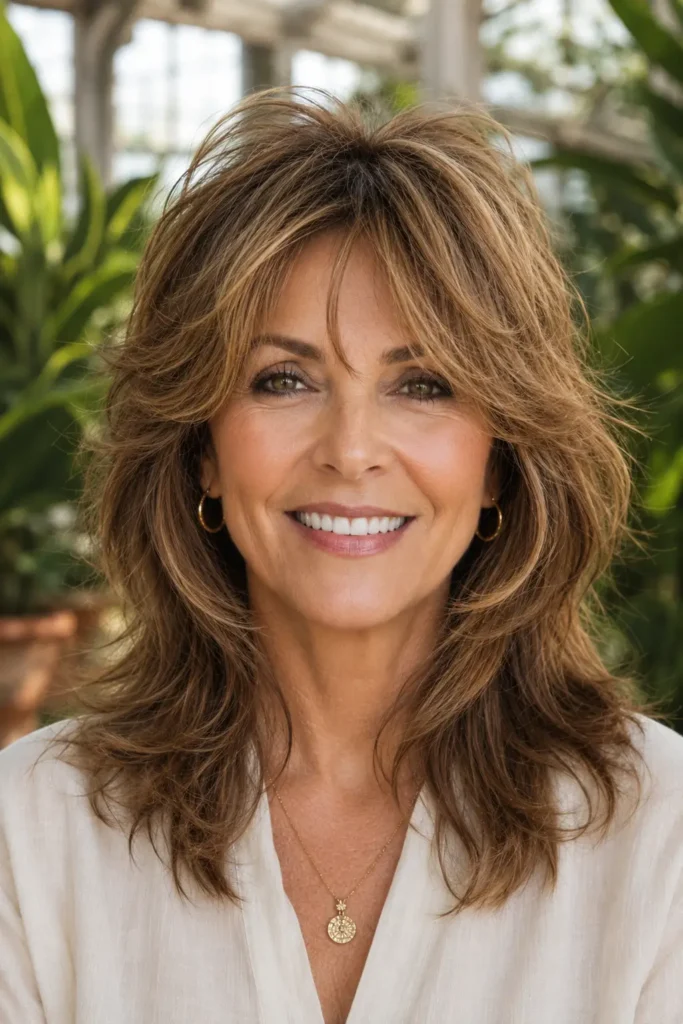
The butterfly shag layers the front sections dramatically shorter than the back, so when you tilt your head, the front pieces lift like wings, hence the name. It’s striking on camera but takes a little practice at home, usually a round brush on the front pieces only, while the back air-dries. I show every client this exact step before they leave.
17. The Balayage Shag
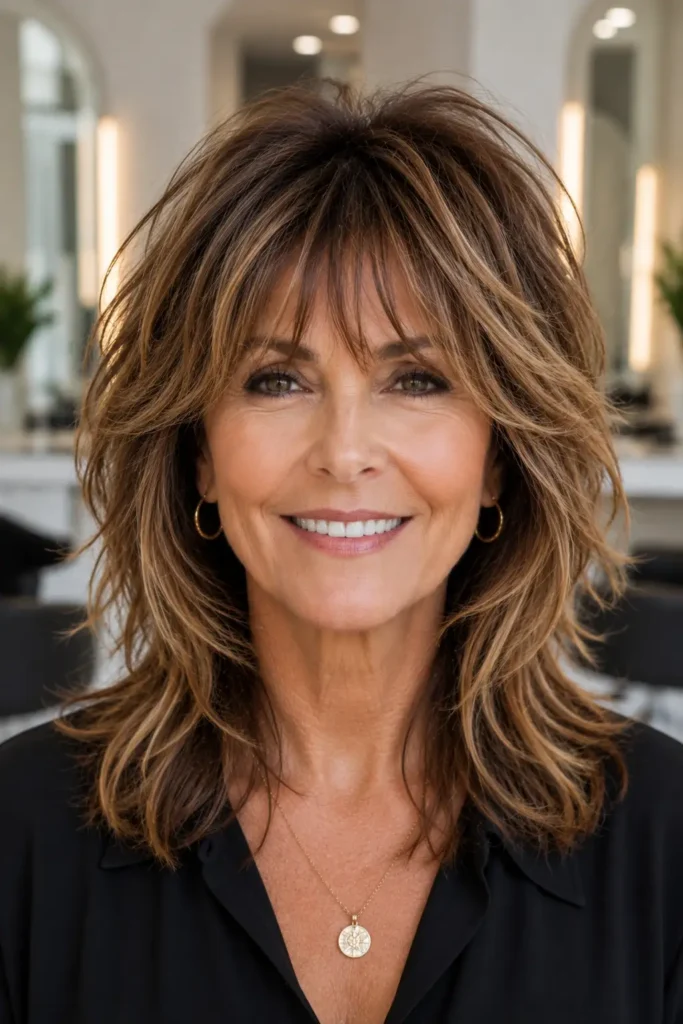
Balayage and shag layers were made for each other because hand-painted color lands differently on every layer, which makes the texture look three-dimensional instead of flat. I usually suggest warm caramel or honey tones for fair-to-medium skin, and a cooler beige tone for cooler undertones. Color upkeep runs every three to four months, longer than a single-process dye.
18. The Blunt-Edge Modern Shag
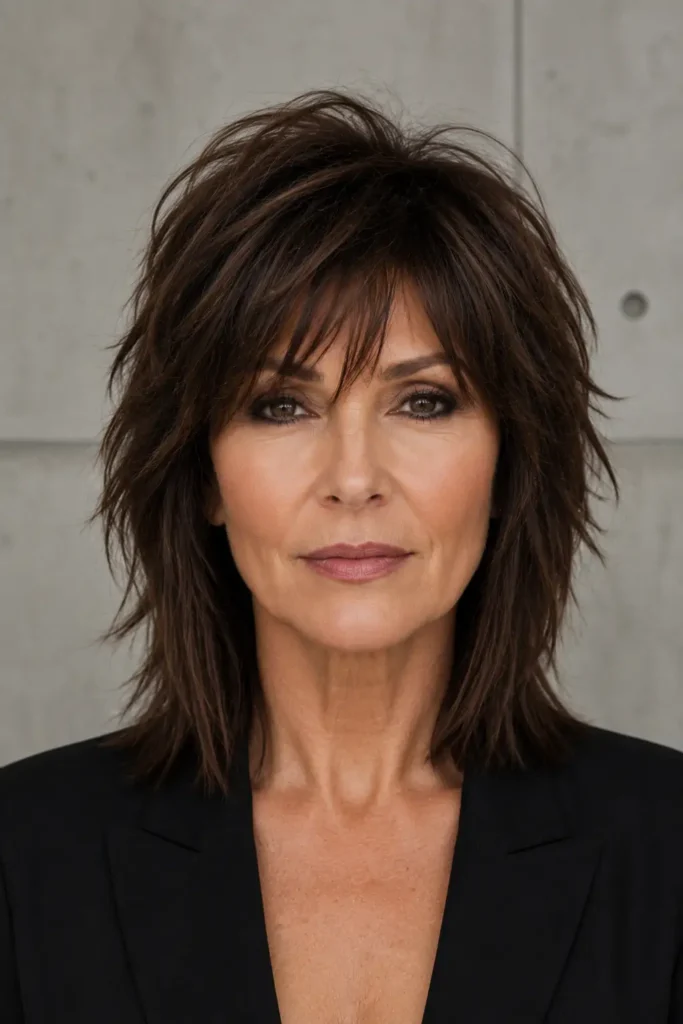
This one bends the rules a little: a blunt horizontal line at the very bottom, with shag layers only through the top and sides. It gives the illusion of thicker ends while still getting movement up top, a smart pick for clients whose hair thins more toward the ends than the roots. It photographs cleaner than a fully choppy shag.
19. The Side-Swept Fringe Shag
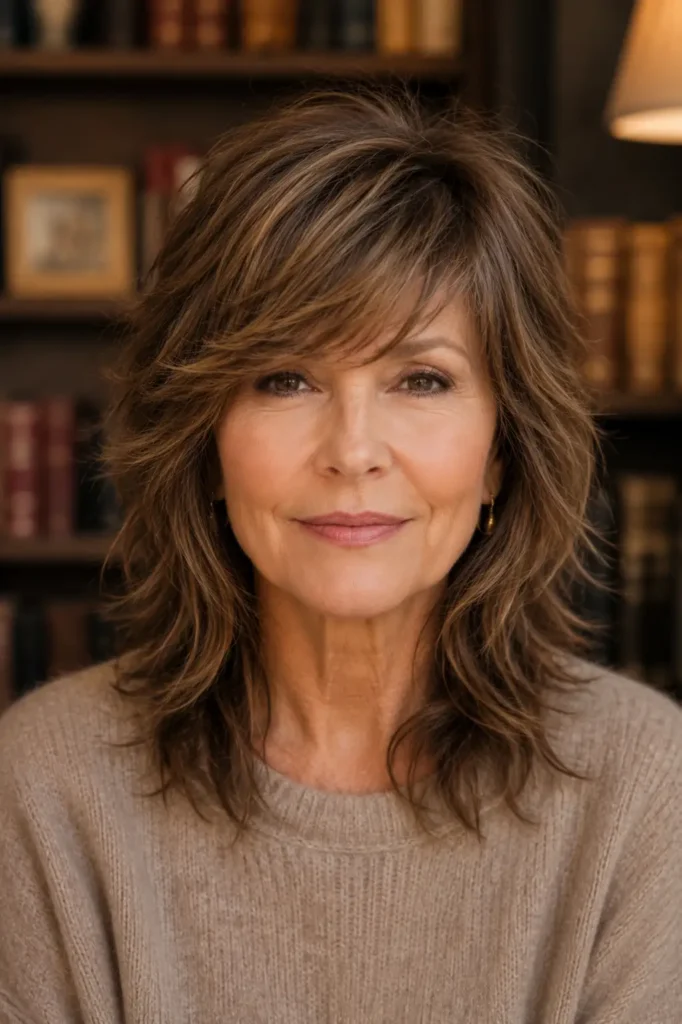
A side-swept fringe avoids the daily commitment of straight-across bangs while still softening the forehead. It blends directly into the shag layers rather than sitting as a separate section, so it grows out far more gracefully than blunt bangs do. I recommend this specifically to clients who travel often and can’t trim their bangs every few weeks themselves.
20. The Round-Face Volume Shag
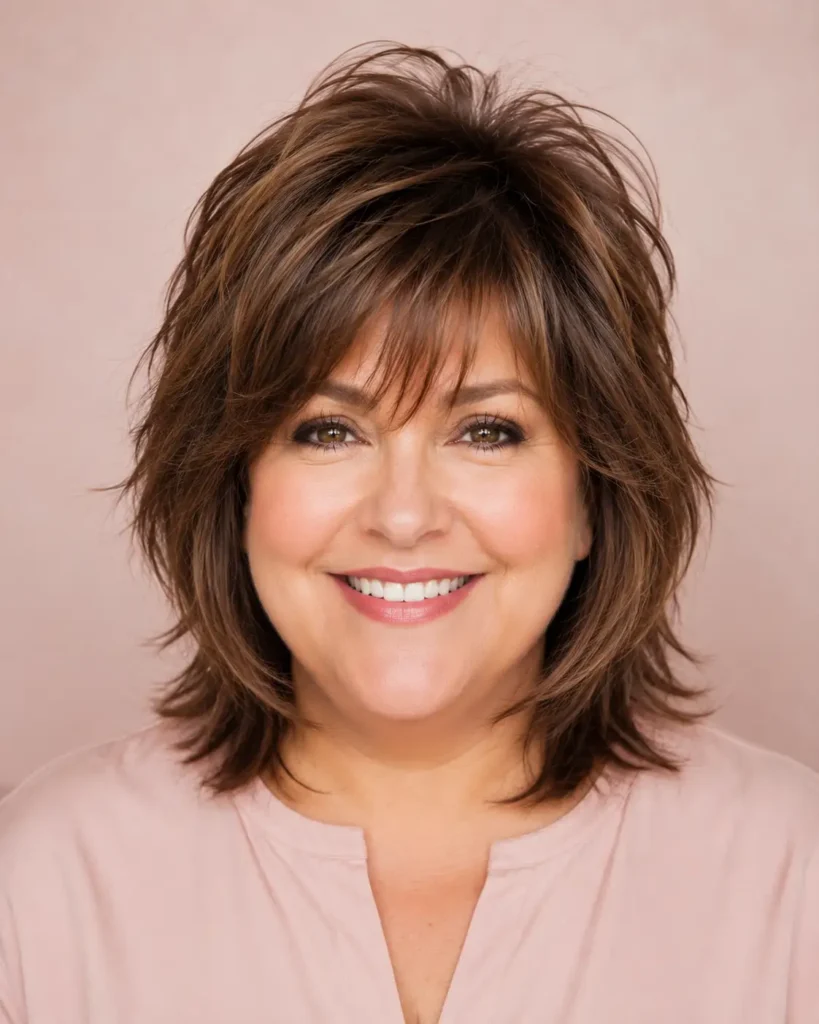
For round faces, I keep layers longer through the jawline and avoid heavy volume directly at the cheeks, which can widen the face instead of flattering it. Volume goes at the crown instead, lifting the silhouette vertically rather than horizontally. It’s a small adjustment that makes a real difference in photos, especially front-facing ones taken close up.
21. The Square-Face Soft Shag
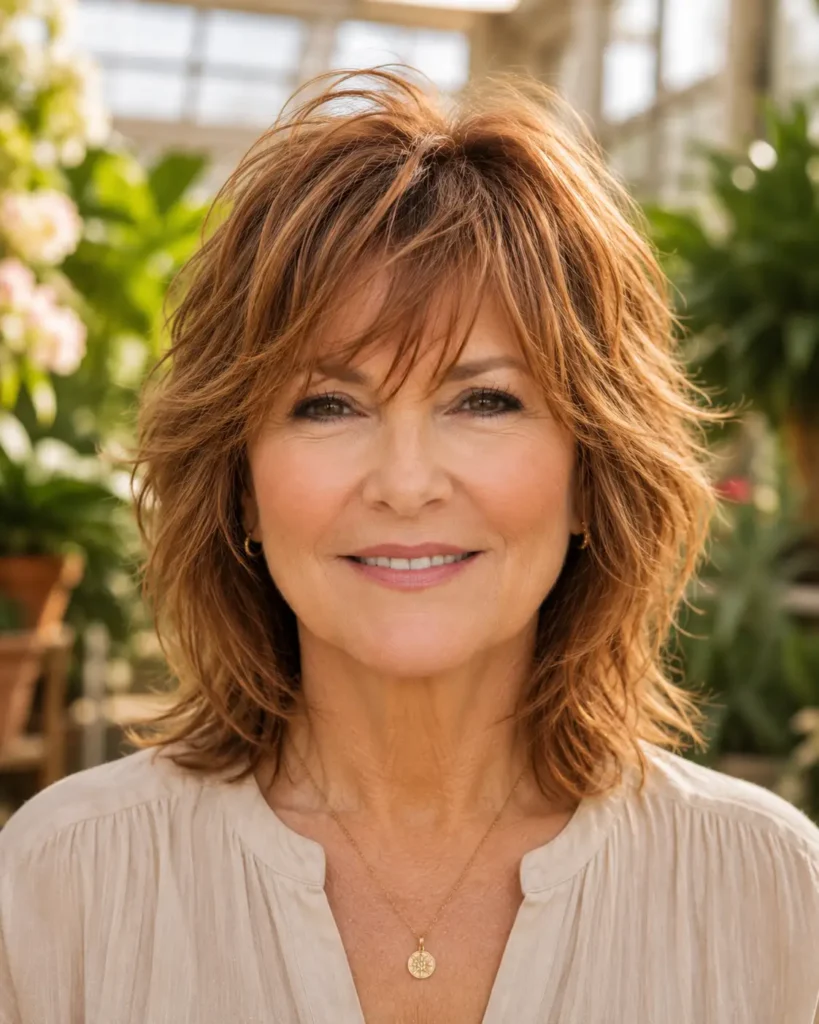
Square jawlines benefit from rounded, feathery layers right at the jaw rather than anything blunt or geometric, which only emphasises the angles further. I soften the cut with a diffuser instead of a flat iron, since heat-straightened ends tend to look sharper and harder than diffused, slightly wavy ones. The difference in photos is subtle but genuinely real.
22. The Cozy Winter Shag
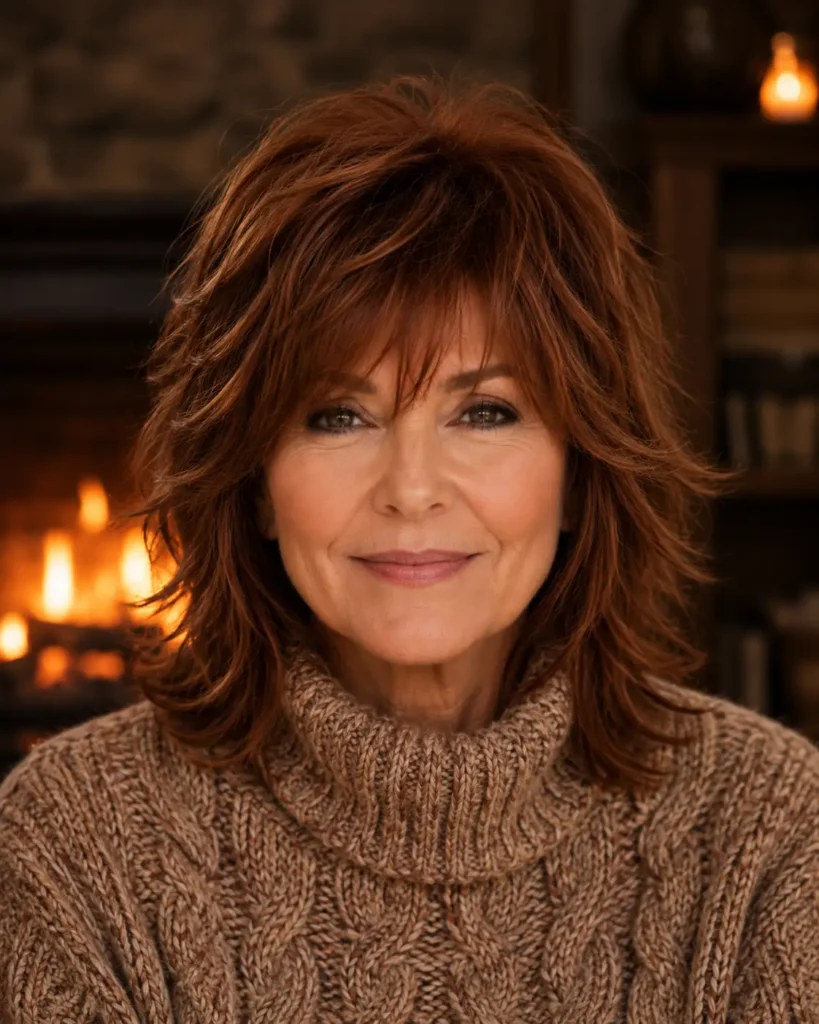
Cold months call for slightly denser layering since static and dry indoor heat flattens texture fast otherwise. I add a leave-in cream, something like Verb Ghost Oil, applied to just the ends before any blow-drying in winter to control frizz and static cling. It’s a small seasonal swap that keeps a shag from looking limp by February.
Mistakes I See Most Often With Shags on Older Clients
The biggest one is asking for “just a trim” on a haircut that hasn’t been reshaped in over a year. Shags grow out unevenly because the layers grow at different rates, so by month four the silhouette has already shifted. A trim alone won’t fix layers that have grown into the wrong proportions; it just maintains the wrong shape a little longer.
The second mistake is going too short too fast around the face, especially right before a big event. I always tell clients to get face-framing layers cut a few weeks ahead of a wedding or photoshoot, never the day before, because hair needs a wash cycle or two to fall into its real shape instead of looking freshly chopped.
The third is skin care for hair, basically: colour-treated clients skipping a bond-repair step at home after going lighter for a shag. Lightened ends snap and frizz faster than the rest of the cut, which undercuts the whole soft, layered look you just paid for in the chair.
Choosing the Right One for You
If you take one thing from this list, let it be the photo advice from earlier: bring two references, not one, and say your actual hair type out loud before the scissors come out. Every shag here has worked beautifully on someone and looked wrong on someone else, and the difference almost always came down to that first five-minute conversation, not the cut itself.
I still get clients who walk in nervous about layers after years of the same length, and almost every single one leaves asking why they waited so long. Hair changes after fifty, and the cuts that work best change with it. A good shag doesn’t fight that; it works with it.

Sarah Williams
Hi, I’m Sarah Williams — the founder of HerStyleNest, where beauty meets modern style. I share trendy hairstyles, chic nail designs, and fashion inspiration for women who love staying stylish every season. From everyday elegance to viral beauty trends, HerStyleNest is your go-to destination for effortless fashion and beauty ideas.