
20 Honey Brown Balayage Ideas That Look Expensive Without the Price Tag
The first time I asked for honey brown balayage, I had a screenshot saved on my phone for three months. I kept second-guessing myself — would the warmth wash me out, would my dark base even take the colour, would it look muddy after two weeks? It did not. It was, honestly, the best hair decision I have made in years, and I have been chasing that warmth ever since.
Honey brown balayage sits in this sweet spot where it reads as natural sun-kissed colour while still being dimensional enough to look intentional. It works across a wider range of base colours than most people realise, and the grow-out is genuinely low maintenance. This article pulls together 20 real ideas across different hair lengths, textures, face shapes, and skin tones so you can walk into your next appointment knowing exactly what you want.
What Makes Honey Brown Balayage Different From Other Techniques
Balayage itself is a freehand painting method where colour is swept onto sections of hair without foils, creating a graduated, blended result. When you apply that to honey brown tones specifically, you get a palette that pulls from golden amber, warm caramel, and light chestnut rather than ashy or platinum territory. The warmth is what sets it apart.
Standard highlights create more uniform, stripe-like colour that can look quite flat in photographs. Honey brown balayage adds depth because the colour starts concentrated near the mid-shaft and feathers toward the ends, leaving the root area largely untouched. That natural shadow at the root is half of what makes this technique look expensive and considered rather than processed.
If you have seen terms like “bronde,” “caramel balayage,” or “golden brown highlights” used interchangeably, honey brown sits right in the middle of all three. The distinction matters when briefing your colourist because the word “honey” tells them you want warmth without going full orange or red, and that guides both toner choice and developer volume.
1. Sun-Kissed Long Layers
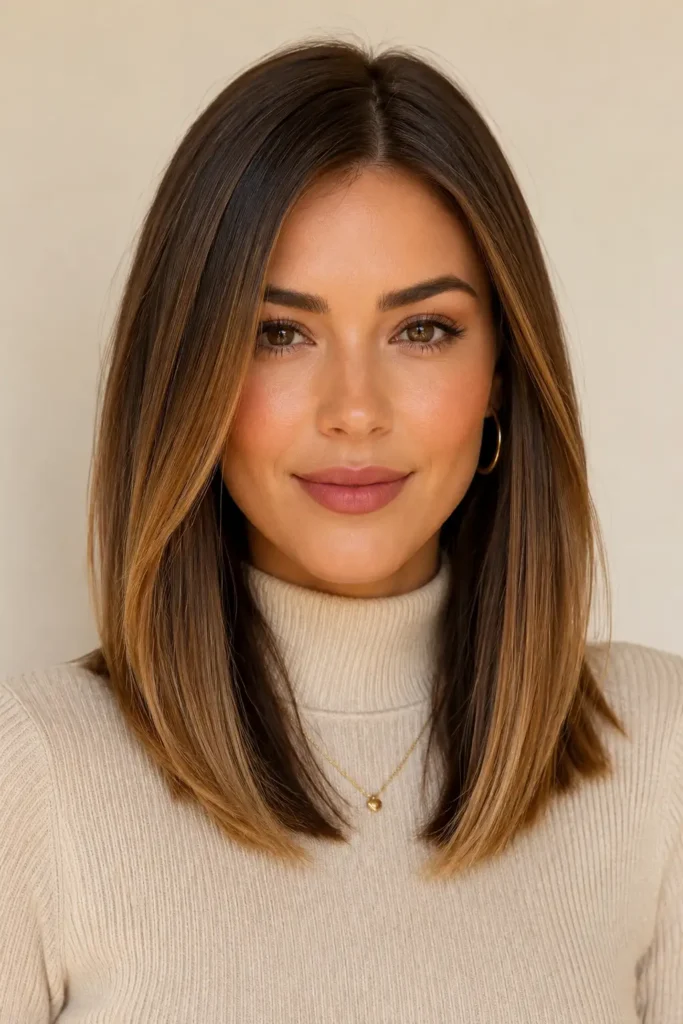
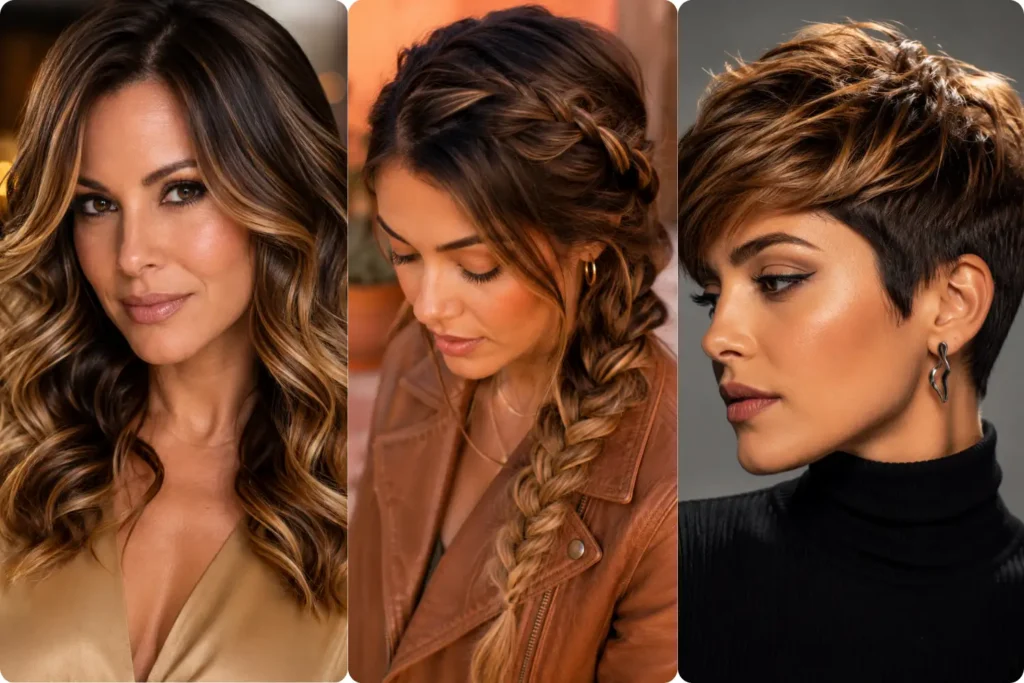
Long hair carries honey brown balayage beautifully because there is more surface area for the colour to graduate. Ask your colourist to concentrate golden honey tones at the last third of your length, keeping the mid-section caramel and the root area close to your natural base. The contrast between root and tip is what creates that just-back-from-a-coastal-holiday look that photographs so well outdoors.
2. Face-Framing Babylights
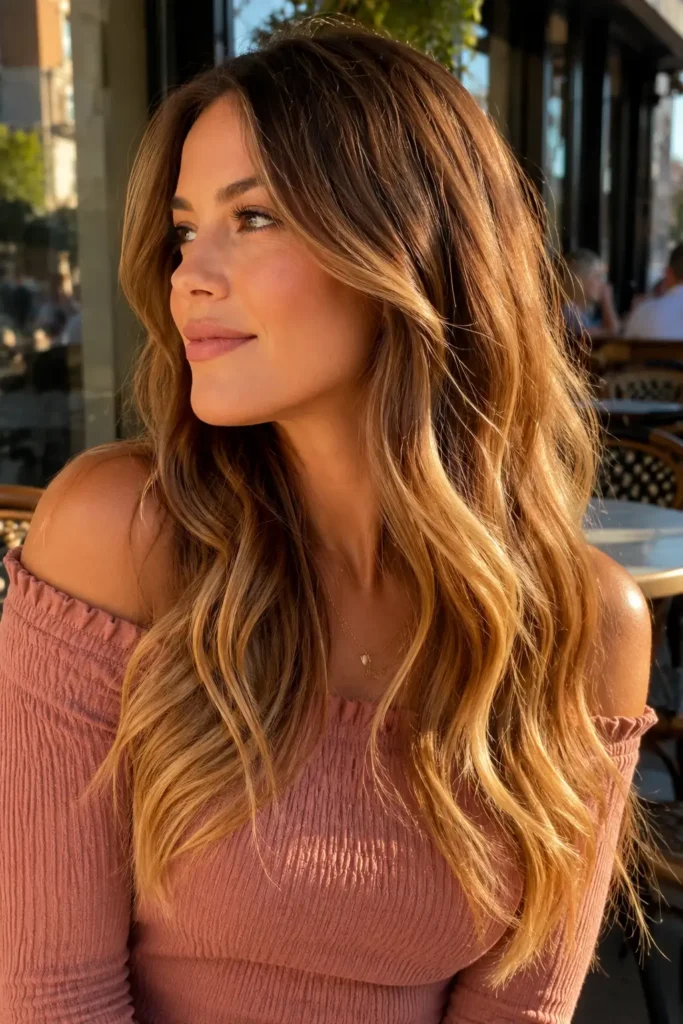
Babylights are very fine, tightly placed highlights that mimic the natural lightening you get around the face when you spend time outside. Adding honey-toned babylights around the hairline and temples softens the look considerably, especially on darker bases. This is one of my favourite techniques for anyone who feels full balayage is too much of a commitment but still wants a visible warmth shift around the face.
3. Honey Brown on a Dark Espresso Base
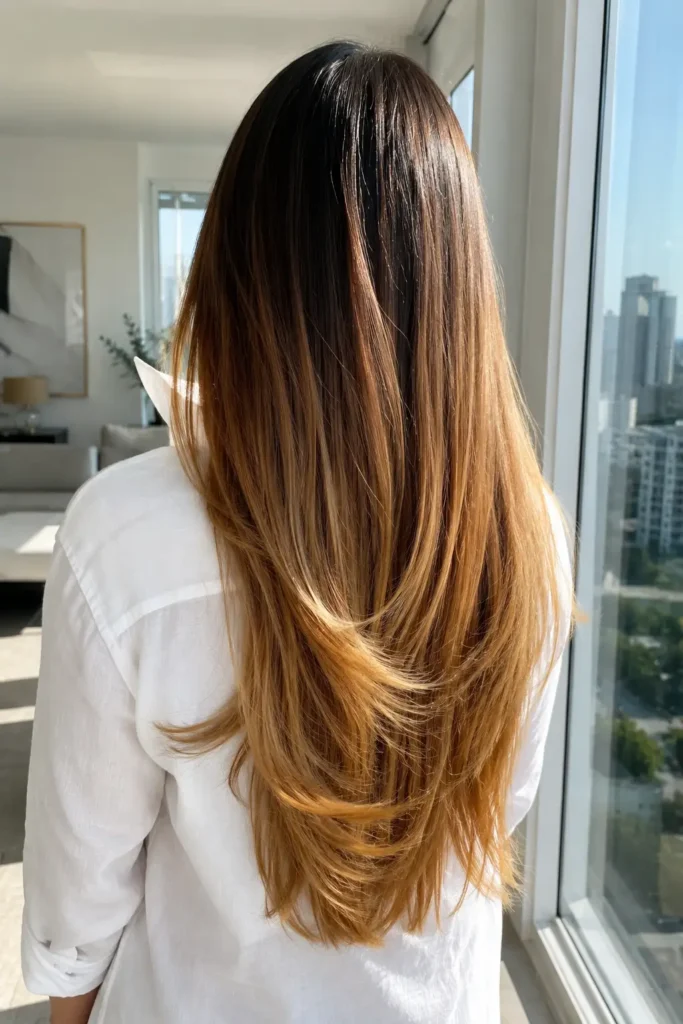
This combination tends to surprise people because the contrast reads as quite striking while still feeling grounded. If you have very dark brown or near-black hair, a skilled colourist can lift sections to a warm amber before toning them down into a honey brown. The result is dimensional rather than brassy — but choosing the right toner at the end of that session is what separates a polished finish from a muddy one.
4. Chunky Honey Sections on Medium Brown Hair
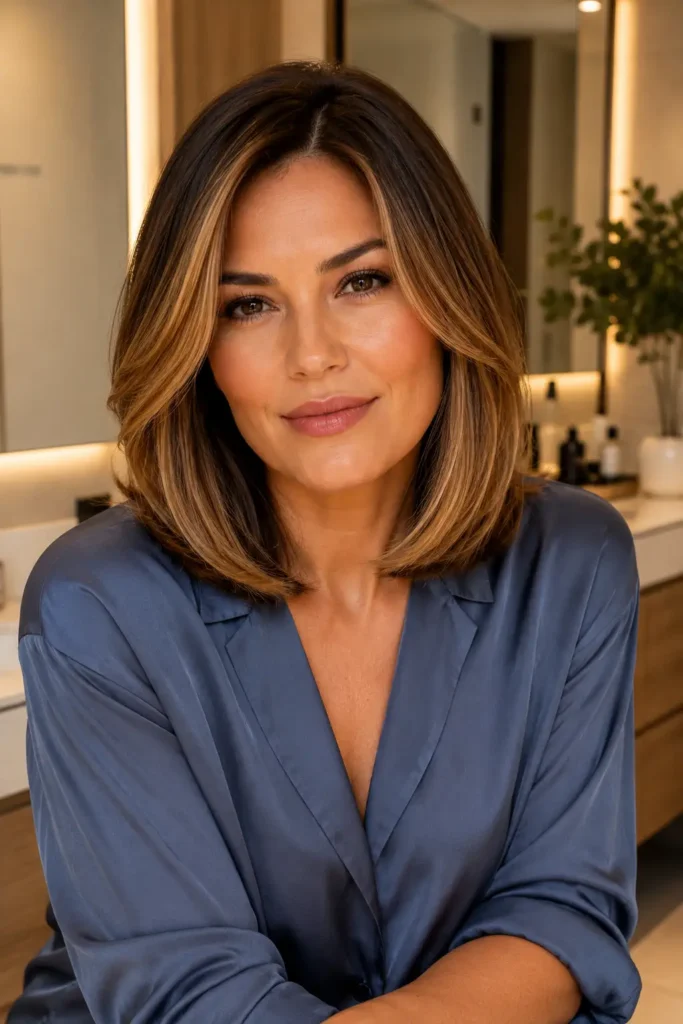
Not every balayage has to be subtle. Slightly wider painted sections create bolder, more graphic colour placement that works particularly well on people with medium to thick hair density. This interpretation leans more editorial and reads as intentionally high-contrast rather than sun-kissed. It suits oval and heart-shaped faces especially well because the wider sections draw horizontal width.
5. Honey Balayage on a Bob
Short hair does not get enough credit in balayage conversations. A chin-length bob with honey brown balayage can be genuinely stunning, particularly when the colourist prioritises face-framing panels and leaves the underneath layer closer to the natural base. The contrast between the darker underlayer and the honey sections creates dimension that moves every time you tuck hair behind an ear.
6. Warm Bronde with Honey Ends
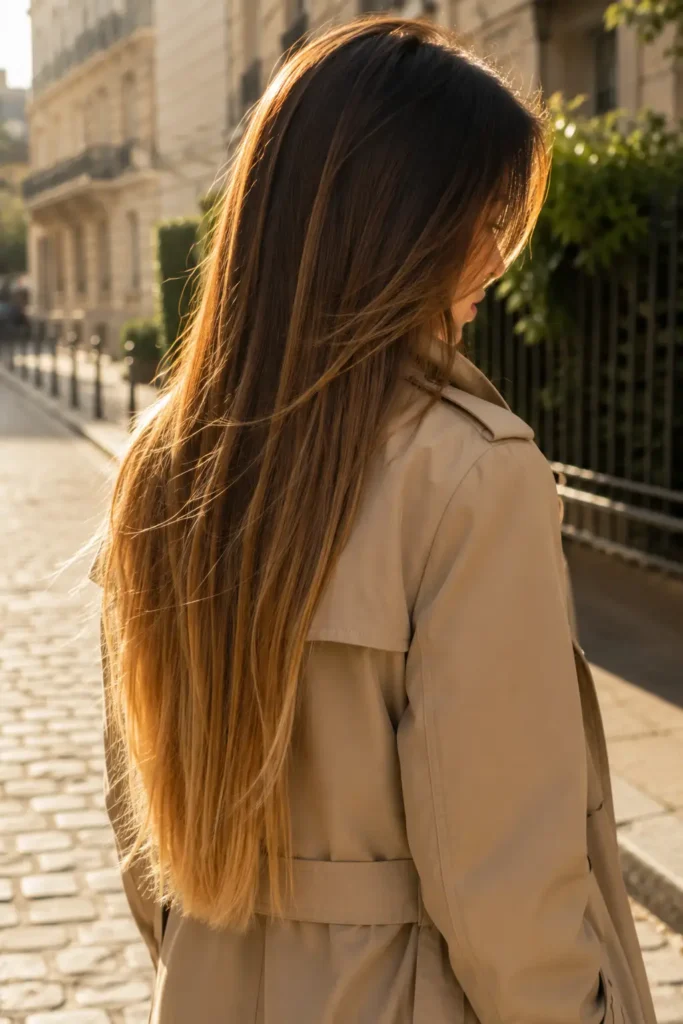
Bronde — the blended space between brunette and blonde — is a perennial favourite for a reason. Painting honey brown tones through a medium brown base and letting them concentrate toward the ends creates a result that reads as almost naturally lightened rather than coloured. This is particularly flattering on warm skin tones like olive and golden beige because the colour picks up the warmth in the complexion rather than fighting it.
7. Honey Brown Highlights on Curly Hair
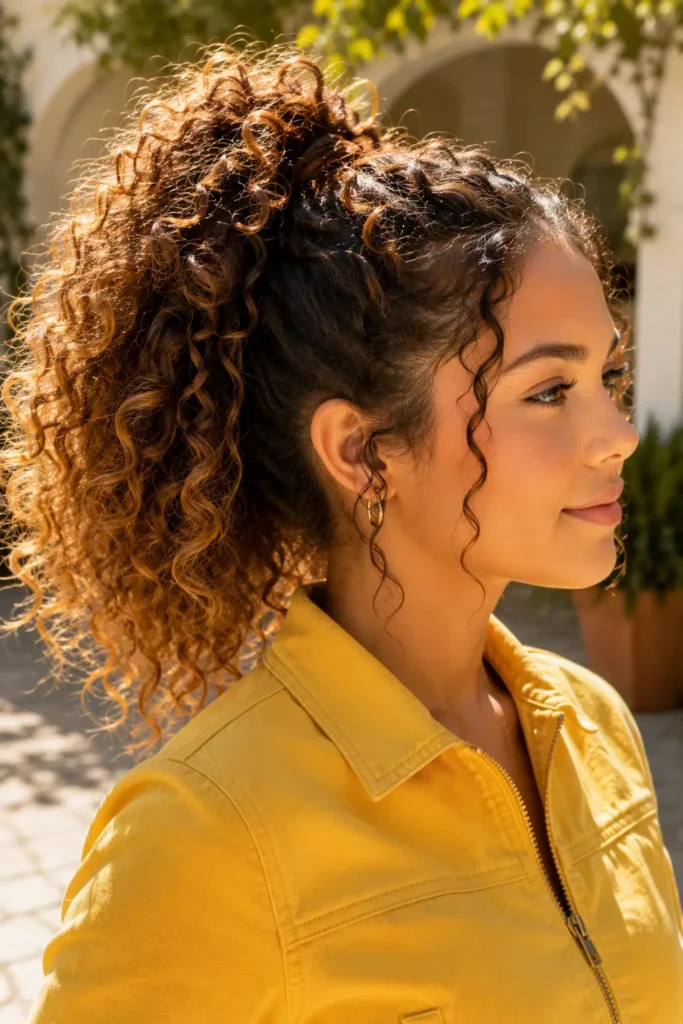
Curly and coily textures interact with balayage differently than straight hair does because the colour pools differently in the curl pattern. Freehand painting works well on curls when the colourist paints individual curl clusters rather than sections. When stretched, the honey tones distribute evenly. When the curl springs back, the colour peeks through at the surface and creates a beautifully sunlit effect that looks three-dimensional even in a simple ponytail.
8. Dimensional Honey Brown for Fine Hair
Fine hair benefits from colour that creates the illusion of volume and depth. Honey brown balayage does exactly that by placing lighter tones at the surface where light catches them and keeping deeper tones underneath. Avoid going too pale on fine hair because the lack of density can make very light ends look thin. Staying in the warm honey to light caramel range gives enough lightness without sacrificing the appearance of fullness.
9. Golden Honey on Shoulder-Length Hair
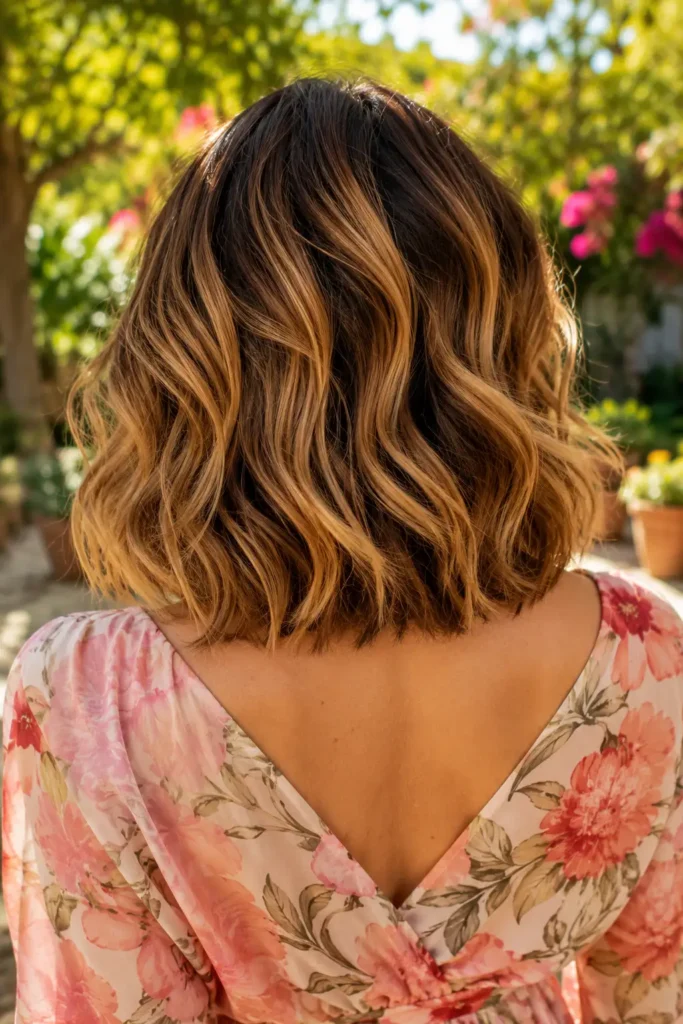
Shoulder-length hair is probably the most common length I see with honey brown balayage, and it works because the transition from root to tip happens within a workable distance. The colourist has enough length to create a proper gradient but not so much that placement becomes complex. If you are looking at shoulder-length hairstyle ideas on HerStyleNest, pairing a honey brown balayage with curtain bangs is a genuinely underrated combination.
10. Subtle Honey Tones on a Pixie or Short Cut
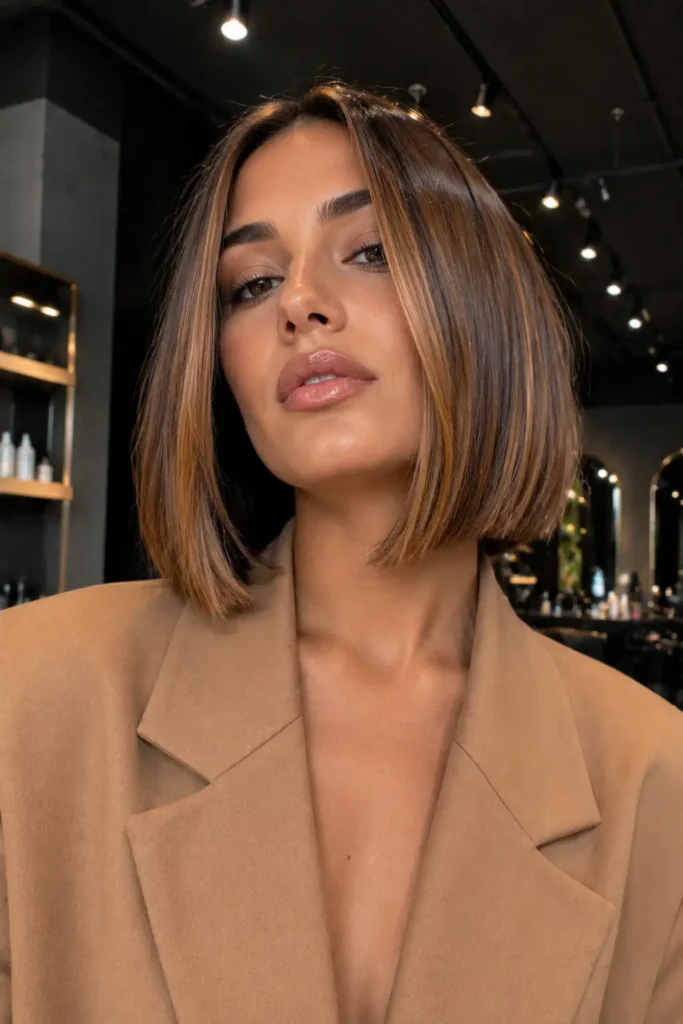
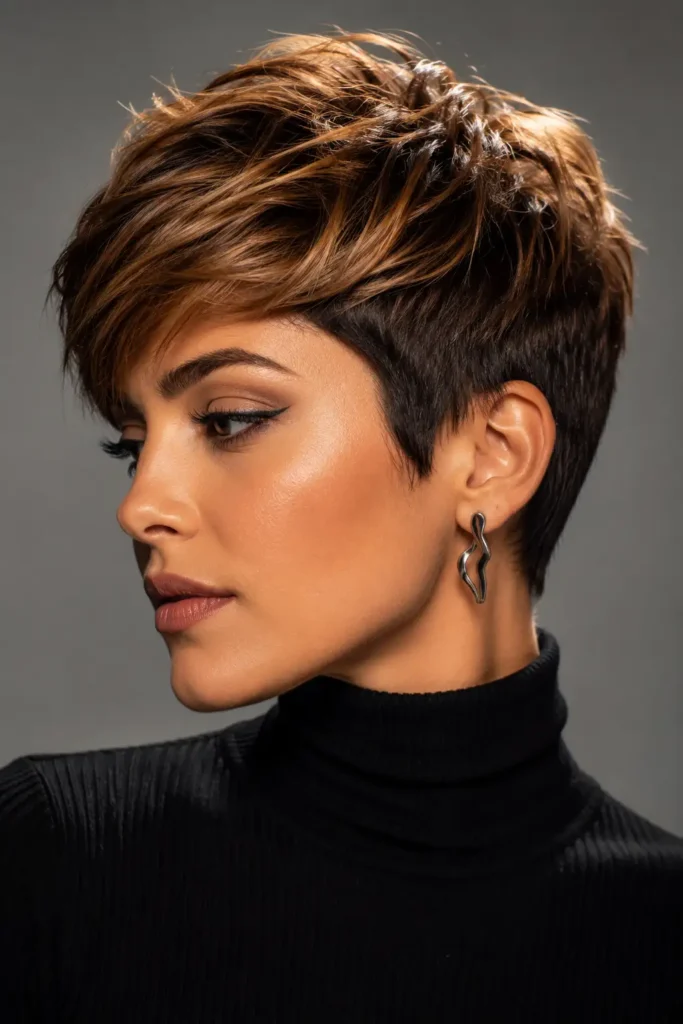
Short cuts benefit from honey brown balayage when the colourist focuses colour on the top sections only, leaving the sides and nape closer to the natural base. This creates a subtle spotlight effect that adds visual interest without overwhelming a short length. It is also one of the lower-maintenance options because there is simply less hair for regrowth to show on.
11. Honey Balayage with a Warm Toner Finish
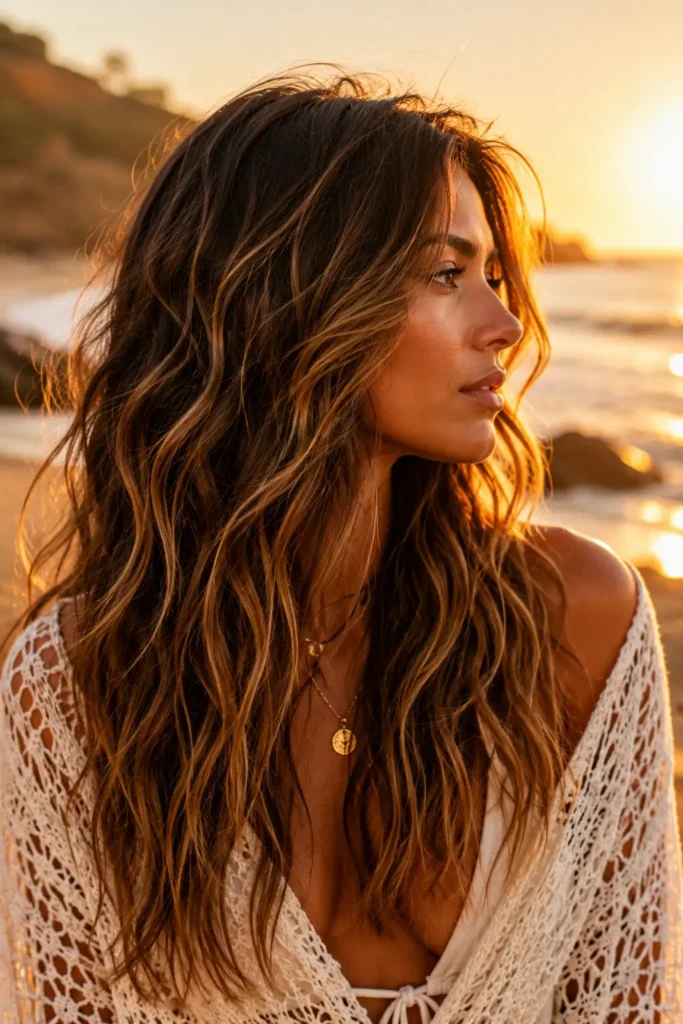
The toner applied at the end of a balayage session is often what makes or breaks the result. A warm peach or golden toner over honey brown sections keeps the warmth intact and prevents any risk of brassiness reading as unintentional orange. Ask your colourist specifically about toner selection before the appointment rather than finding out afterward when the result is already on your head.
12. Rich Chestnut Root with Honey Mid-Shaft
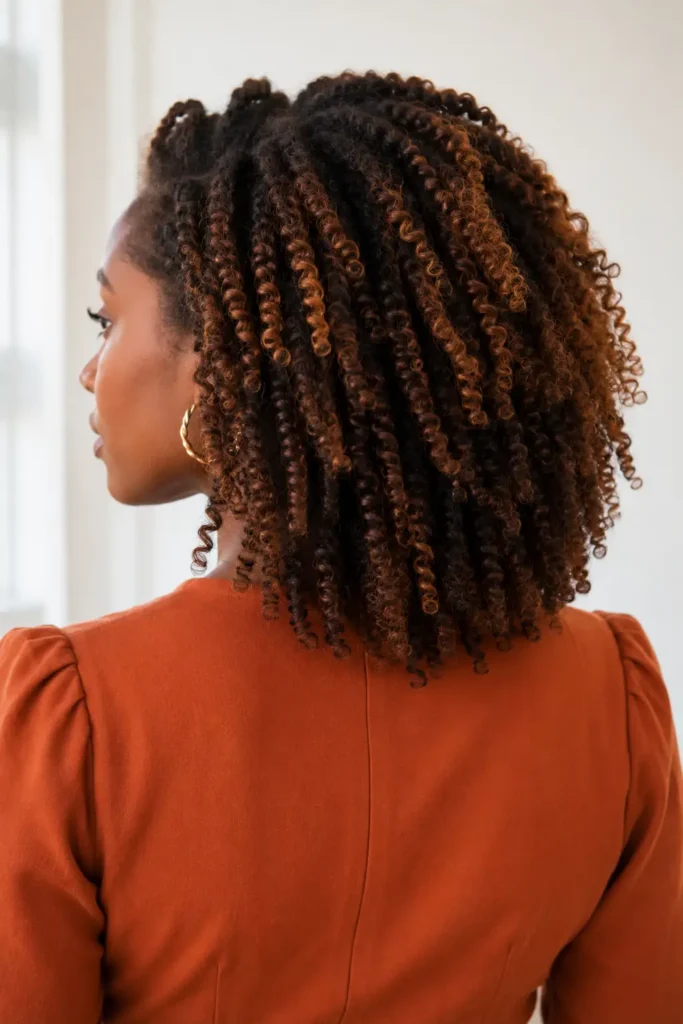
Letting the colour transition happen at the mid-shaft rather than the root creates a very specific kind of depth. The chestnut root feels grounded and intentional while the honey mid-shaft and ends bring the lightness. This is the formula that tends to look best in winter when you want warmth without going fully blond at the ends. The grow-out on this interpretation is also particularly forgiving.
13. Honey Brown Balayage for Women Over 40
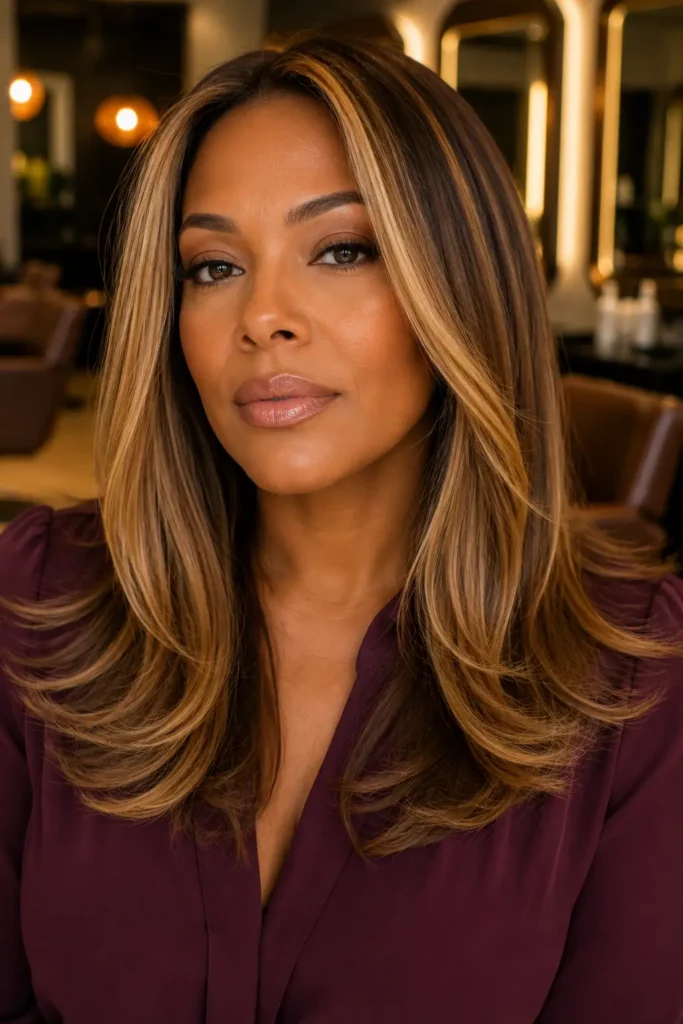
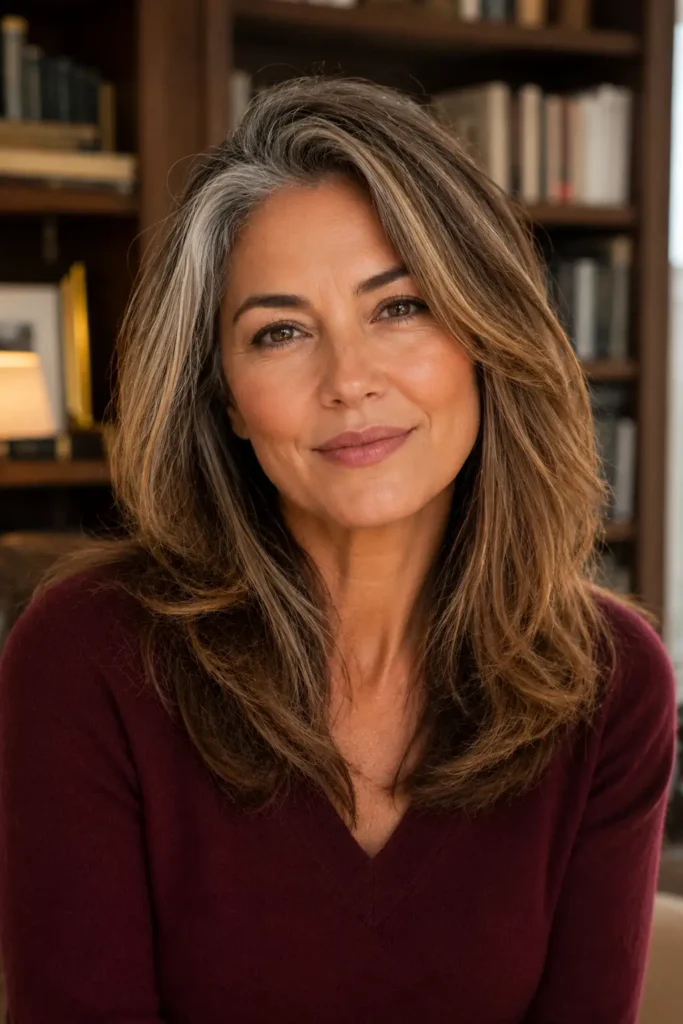
Warm tones are genuinely flattering across most skin tones as they age because they counteract the grey in the complexion that comes with time. Honey brown balayage for women over 40 tends to work best when applied more softly around the face and more densely toward the mid-length, avoiding stark contrast at the root that can visually shorten the face. You can find longer style inspiration on HerStyleNest alongside the colour guidance for layered cuts specifically.
14. Honey Balayage on Natural Black Hair
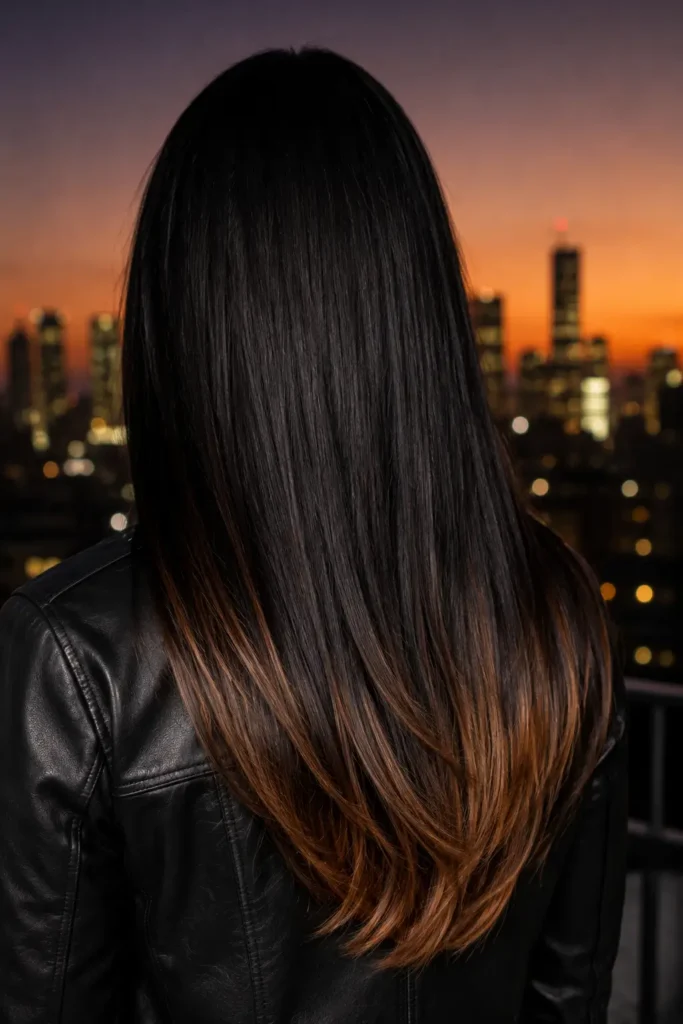
This requires a two-step process in most cases — a lightening session followed by toning — and the result can be extraordinary when managed correctly. The contrast between black roots and honey sections is higher, which means the overall effect reads as bolder than on a medium brown base. Maintenance appointments are important here because the regrowth line is more visible, but even at six to eight weeks it still looks intentional rather than grown-out.
15. Caramel and Honey Mixed Balayage
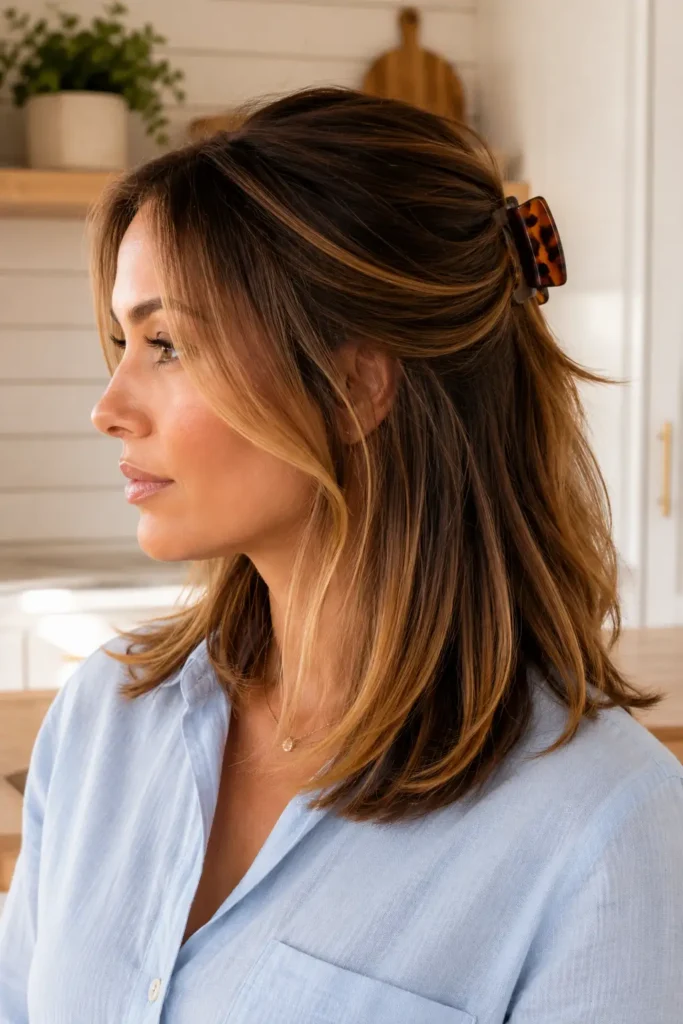
Mixing honey and caramel tones in the same head of hair adds real complexity to the result. The colourist can alternate section depths so some strands lift to a purer honey and others stay in the deeper caramel range. The variation means no two sections look the same, which gives the overall colour that multi-tonal quality that reads as natural rather than applied.
16. Honey Brown Balayage for Thin or Fine Texture
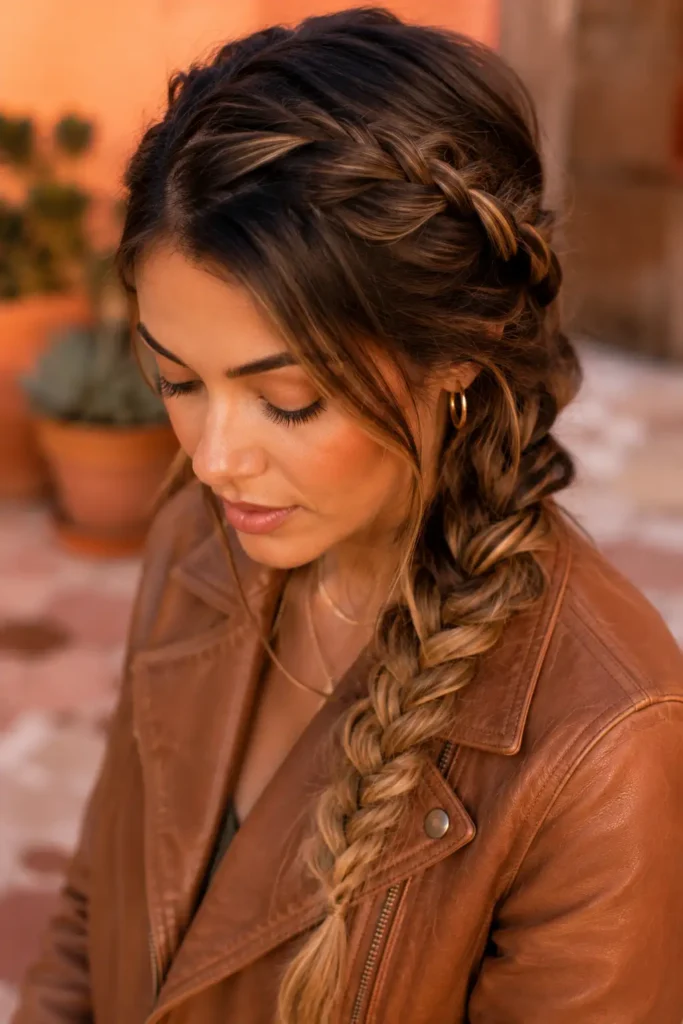
Going lighter on fine hair does carry some risk because chemical processes can affect strand integrity. A skilled colourist will manage developer volume carefully to minimise damage. Using a bond-building treatment like Olaplex No.1 or Schwarzkopf Fibreplex during the lightening process significantly reduces breakage risk. The visual result is worth it — honey tones on fine hair create the appearance of thickness through contrast.
17. Honey Balayage on Wavy Hair
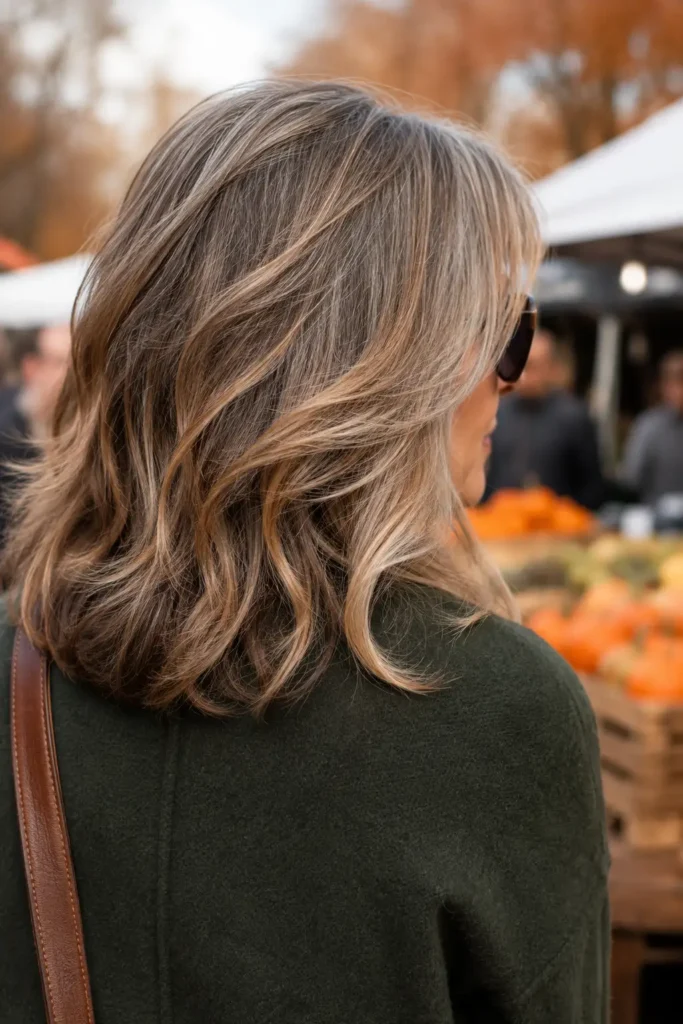
Wavy hair sits between straight and curly in terms of how balayage behaves on the strand. The colour tends to catch at the wave crest, which creates a natural-looking highlight pattern without much precision required in placement. This is a very low-risk application for someone trying honey brown balayage for the first time because the waves do a lot of visual blending work on their own.
18. Honey Brown Balayage for a Wedding or Event
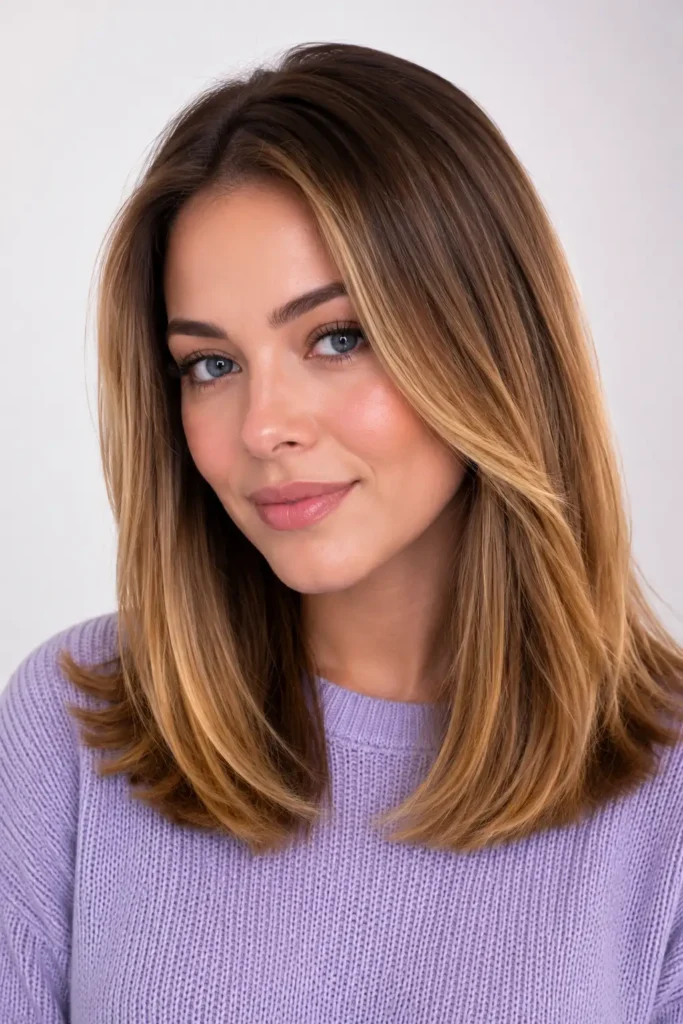
If you are planning a significant event, honey brown balayage is one of the safest colour choices you can make. It photographs warmly, looks flattering under both indoor venue lighting and outdoor natural light, and does not require a fresh appointment to look good. Doing your initial balayage six to eight weeks before the event gives the colour time to soften and settle into the most natural-looking version of itself.
19. Honey Highlights on Grey-Blending Hair
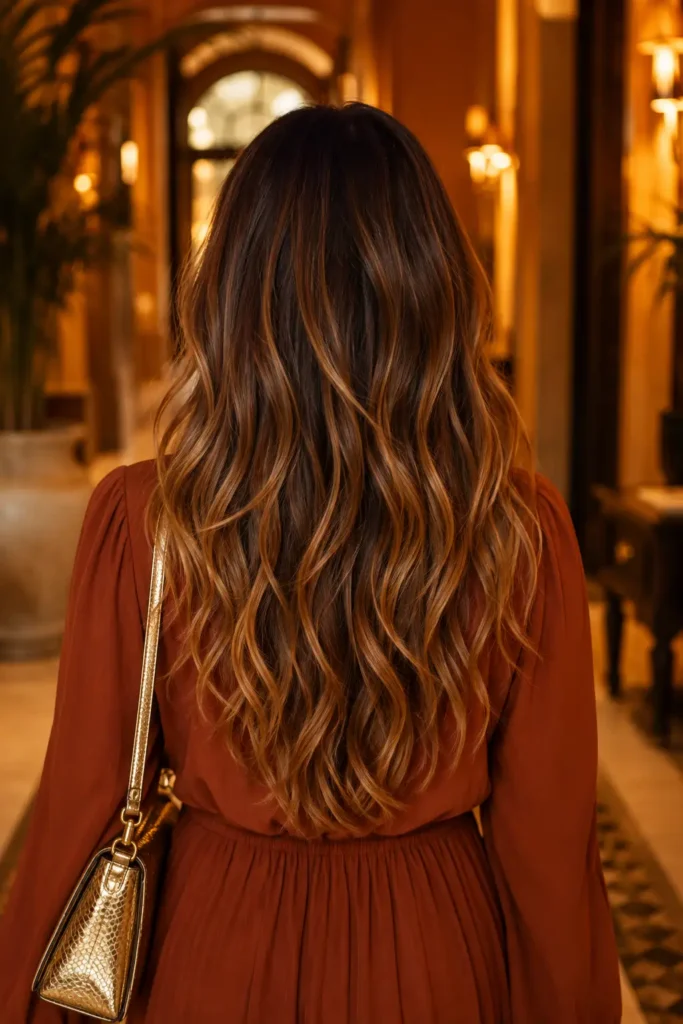
Grey hair has a different porosity than pigmented hair, which means it lifts quickly and can sometimes read as too stark when highlighted. Using honey brown tones on grey-blending hair is smart because the warmth counteracts the coolness of the grey rather than clashing with it. The result is a blended, multi-tonal colour that makes grey feel part of the design rather than something being hidden.
20. Full-Head Honey Brown Transformation
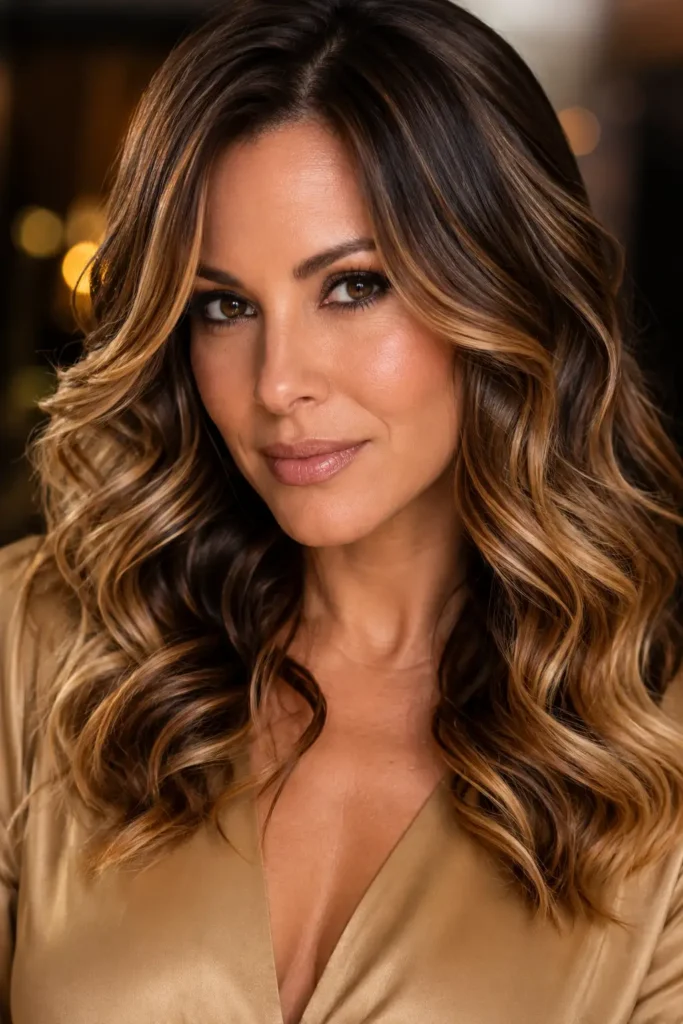
For someone moving from a single-process colour or an old highlight job to honey brown balayage, a full-head transformation appointment is the most thorough option. This typically involves a colour correction or lightening stage, followed by toning and possibly glossing to even out the result. It is the longest appointment of the options listed here but delivers the most dramatic before-and-after shift, and the grow-out is still more forgiving than a single-process colour because of the freehand technique.
How to Choose the Right Honey Brown Balayage for Your Face Shape
Face shape is genuinely useful information to bring to your colourist because colour placement can work with or against your bone structure. For round faces, concentrating honey tones toward the front sections and keeping the underneath darker adds vertical emphasis. For square faces, softer and more blended colour around the jaw softens the angles. Heart-shaped faces benefit from honey tones that are slightly heavier at the mid-length and ends to balance a wider forehead.
Oval faces carry most versions of honey brown balayage well because the proportions are naturally balanced. If you have a long or narrow face, wider honey sections on either side of the face add width, while keeping colour away from the very top of the head prevents elongation. It is worth mentioning your face shape to your colourist at the start of the appointment rather than relying on them to assume.
Mistakes to Avoid With Honey Brown Balayage
Skipping the toner conversation
The lightened sections after a balayage session are not the finished result — the toner is. Clients who leave without a toner can end up with a brassier, more orange-yellow result that is not what honey brown is meant to look like. Always ask your colourist what toner they are planning to use and what result it produces. If they cannot answer that question clearly, it is worth asking a follow-up.
Washing with the wrong shampoo
Colour-safe, sulphate-free shampoos are not optional with honey brown balayage. Sulphates strip colour aggressively, particularly the warm tones in a honey palette. Switching to a sulphate-free formula immediately and washing with cool to lukewarm water extends the life of the colour significantly. Colour-depositing conditioners in warm golden or caramel tones can also top up the warmth between appointments.
Going too light too fast
If you have dark hair and want a visible honey brown result, your colourist may tell you it requires more than one session. Trying to rush that process in a single appointment risks damaging the hair and producing a result that is too brassy to tone down properly. A phased approach over two appointments is slower but produces a more controlled, healthier result.
Ignoring heat protection
Balayage involves chemical lightening, which leaves the highlighted sections slightly more porous and therefore more vulnerable to heat damage. Using a heat protectant spray before any hot tool application is non-negotiable. Products like Kenra Platinum Silkening Mist or Redken Iron Shape work well because they also add smoothness that enhances the honey colour visually.
Product Suggestions for Maintaining Honey Brown Balayage
Olaplex No.3 Hair Perfector used weekly as a pre-shampoo treatment keeps colour-treated hair in much better condition than skipping it does. It is not a conditioner but a bond-builder, and the difference in strand integrity over several months of regular use is genuinely noticeable. Pair it with a good colour-protecting conditioner like Pureology Hydrate or Redken All Soft for daily moisture.
For toning maintenance at home, warm-toned gloss treatments like the Kristin Ess Signature Gloss in Champagne or Clairol Professional Beautiful Collection in Honey are manageable for most people. These do not dramatically lift or change the colour but refresh the warmth and add shine, which is exactly what honey brown tones need between salon visits. You can explore curl-specific and fine hair maintenance tips on HerStyleNest if your texture requires a different approach.
Dry shampoo is particularly useful for honey brown balayage because the warmth of the colour can look slightly flat when hair is freshly washed and lacks texture. A light application of dry shampoo at the roots, followed by a warm round brush blowout, brings dimension back to the colour. Batiste Dry Shampoo in the original formula works well for darker bases without leaving a white cast.
Seasonal Trends for Honey Brown Balayage in 2026
Spring and summer tend to push the honey palette brighter, with colourists leaning more toward golden highlights and lighter ends. Autumn and winter are when the same base shade reads differently — richer, more chestnut-adjacent, with less contrast between root and mid-shaft. The honey brown palette is flexible enough that you can shift it seasonally without a full colour change, just by adjusting the toner applied at a gloss appointment.
The trend toward very natural, barely-touched colour is particularly relevant to honey brown balayage in 2025. Clients and colourists are both gravitating toward less visible overlap at the application point and more time spent on seamless blending after. The result looks less “done” and more like the hair genuinely grew out that way. It is a harder technique to execute than it looks, which is another reason why choosing an experienced balayage specialist matters.
Frequently Asked Questions
How long does honey brown balayage last?
Honey brown balayage typically looks its best for 10 to 16 weeks before the toner starts to fade and the ends read lighter than intended. The overall colour does not disappear but the warmth dulls over time. A gloss or toner refresh appointment at around 10 weeks extends the life significantly without a full recolour.
Can I get honey brown balayage on black hair?
Yes, but it usually requires a two-step process — lightening and then toning. Very dark hair needs to be pre-lightened before honey tones can be applied accurately. One session may not achieve the full result, and a follow-up appointment is often needed. Choosing a colourist with experience on dark bases is essential to avoid uneven or brassy results.
Is honey brown balayage suitable for cool skin tones?
Warm tones like honey do lean more naturally toward warm and neutral skin tones. That said, the shade can be adjusted to sit slightly less orange and more golden, which works on cool undertones too. Showing your colourist reference images in good lighting and discussing your skin tone at the consultation helps them calibrate the formula accordingly.
How much does honey brown balayage cost?
Pricing varies widely by location, salon tier, and hair length. In most mid-range salons, a full balayage with toner sits between $120 and $250. Add a haircut and the figure rises. High-end editorial salons in major cities can charge considerably more. Getting a clear quote before the appointment that includes the toner and any treatments prevents surprises at the end.
How do I stop honey brown balayage going brassy?
Brassiness usually comes from either an insufficient toner at the original appointment or colour fading unevenly. Using a sulphate-free shampoo, washing less frequently, and applying a warm-toned gloss at home every three to four weeks manages the fade. Avoiding chlorinated water without a swim cap also protects warm tones from premature stripping.
Does honey brown balayage damage hair?
Any chemical lightening carries some risk of damage, but balayage is generally considered lower-impact than traditional foil highlights because fewer sections are processed and the hair is never fully saturated. Using a bond-building treatment during the appointment and a strengthening home care routine minimises structural damage considerably over time.
What is the difference between honey brown balayage and caramel balayage?
Honey brown sits lighter and more golden than caramel, which tends to read as a richer, more amber-adjacent tone. Both are warm, but honey has more yellow in it and caramel more red-orange. The difference matters at the toner stage, and colourists who understand the distinction will choose different formulas for each. Reference images help make this clear faster than verbal descriptions.
Can I do honey brown balayage at home?
Technically yes, but the results are difficult to control without professional training. Balayage requires an understanding of how colour travels through hair sections and how to blend effectively at the root. DIY kits exist but tend to produce more uniform results that do not replicate the freehand technique. For a first attempt, a professional appointment is a safer investment.
Ready to Book Your Appointment?
Honey brown balayage has been one of the most consistently requested colour techniques for years, and the reason is simple — it works across so many hair types, textures, and skin tones that almost anyone can find a version of it that suits them. The twenty ideas in this article are a starting point, not a fixed menu. Bring three or four reference images to your appointment, discuss your face shape and maintenance preferences, and trust your colourist to adjust the formula to your specific hair.
The most important thing you can do before that appointment is research your colourist’s work specifically in honey and warm brown tones. Portfolio images on Instagram or their salon booking page tell you immediately whether their colour style matches what you want. A great colourist working with honey brown balayage is one of the better investments you can make in your overall appearance, and the result speaks for itself every time you catch your hair in the right light.
Sarah Williams
Hi, I’m Sarah Williams — the founder of HerStyleNest, where beauty meets modern style. I share trendy hairstyles, chic nail designs, and fashion inspiration for women who love staying stylish every season. From everyday elegance to viral beauty trends, HerStyleNest is your go-to destination for effortless fashion and beauty ideas.